


70
Making Printer Settings
Head-flushing
Follow the procedure below to perform a thorough print-head cleaning. Since this consumes more ink than a nor-
mal head cleaning does, perform this when the problem persists after performing a normal head cleaning.
When the Print cartridge is empty, replace it instead of performing a print-head cleaning. After a Print cartridge
is replaced, a print-head cleaning will be automatically performed.
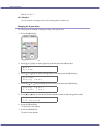
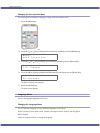
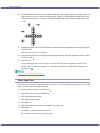
1. Slide the envelope selector to the forward position.
2. Open the printer properties dialog box.
3. Click the [Maintenance] tab.
4. Click [Head-flushing].
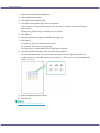
5. In the [Select print-head(s)] area, select a colour.
6. Click [Next >].
7. Select the [Head-flushing] check box.
8. Click [Next >].
Head cleaning starts.
Do not perform another operation before cleaning is complete.
9. Click [Finish].
To check the condition of print-heads after cleaning, select the [Print nozzle check test pattern] check box,
and then click [Next >]. The nozzle check starts.
z
A full print-head cleaning consumes a lot of ink. Perform it only when necessary.
z
A full print-head cleaning may deplete the ink before the Print cartridge is expected to need to be changed.
z
p.151 "Two Types of Printer Properties Dialog Box"
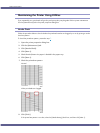
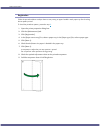
Adjust Print-head Positions
Follow the procedure below to print a test pattern and adjust the print-head positions if vertical lines are printed
unaligned or printed colours look blurred.
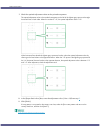
To check the printed test pattern, proceed to step 8
.
When the envelope selector is not at the correct position, the colours may be printed unaligned.