12
SETTING THE
COMMENT
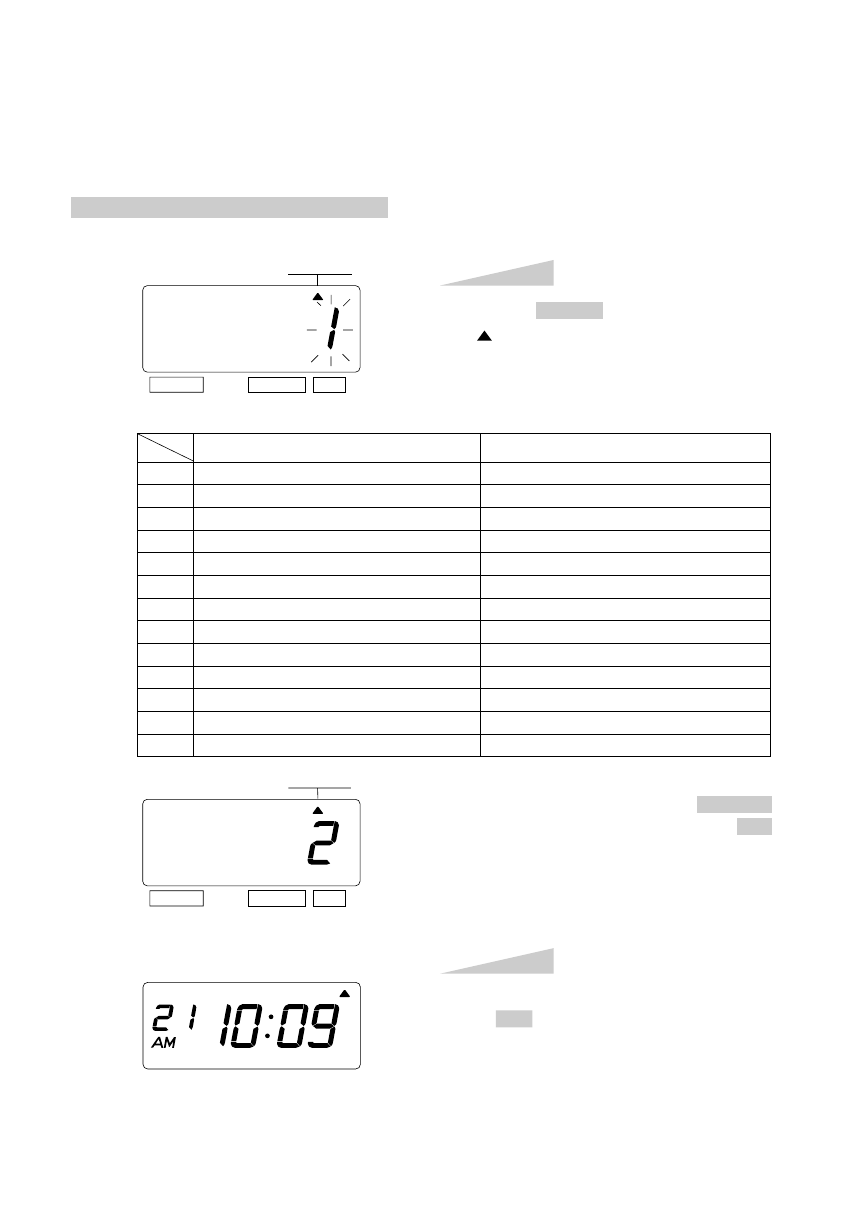
Example: Change the comment to "SENT".
Press the SELECT button and position the
" " mark at the "COMMENT".
At that moment, the flashing digits indicate
"Order Options" of the comment.
(The flashing means it can be changed.)
Step 1
COMMENT
COMMENT
SELECT CHANGE SET
SELECT CHANGE SET
After you finish setting the comment, press
the SET button once again.
Now the comment setting has been
completed. Replace the cover and lock.
IMPORTANT: If you do not complete
Step 2, the clock will not print.
Step 2
1.
2.
3.
4.
5.
6.
7.
8.
9.
10.
11.
12.
13.
Order Options
RCVD
SENT
IN
OUT
CFMD
FILED
PAID
USED
FAXED
VOID
ORIGN
APR'D
CMPL'D
Print Example
JAN 31 '01 RCVD
JAN 31 '01 SENT
JAN 31 '01 IN
JAN 31 '01 OUT
JAN 31 '01 CFMD
JAN 31 '01 FILED
JAN 31 '01 PAID
JAN 31 '01 USED
JAN 31 '01 FAXED
JAN 31 '01 VOID
JAN 31 '01 ORIGN
JAN 31 '01 APR'D
JAN 31 '01 CMPL'D
In case of the example, press the CHANGE
button to set at "2". And then press the SET
button.
TU WE TH FR SA SUMO


