SETTING THE DISPLAY FORMAT
SETTING THE TIME
It is recommended that during initial installation you manually set the time, date, and time zone.
(See "SETTING THE TIME ZONE" section.) The 1600E will automatically correct itself when
it receives a radio signal from the atomic clock.
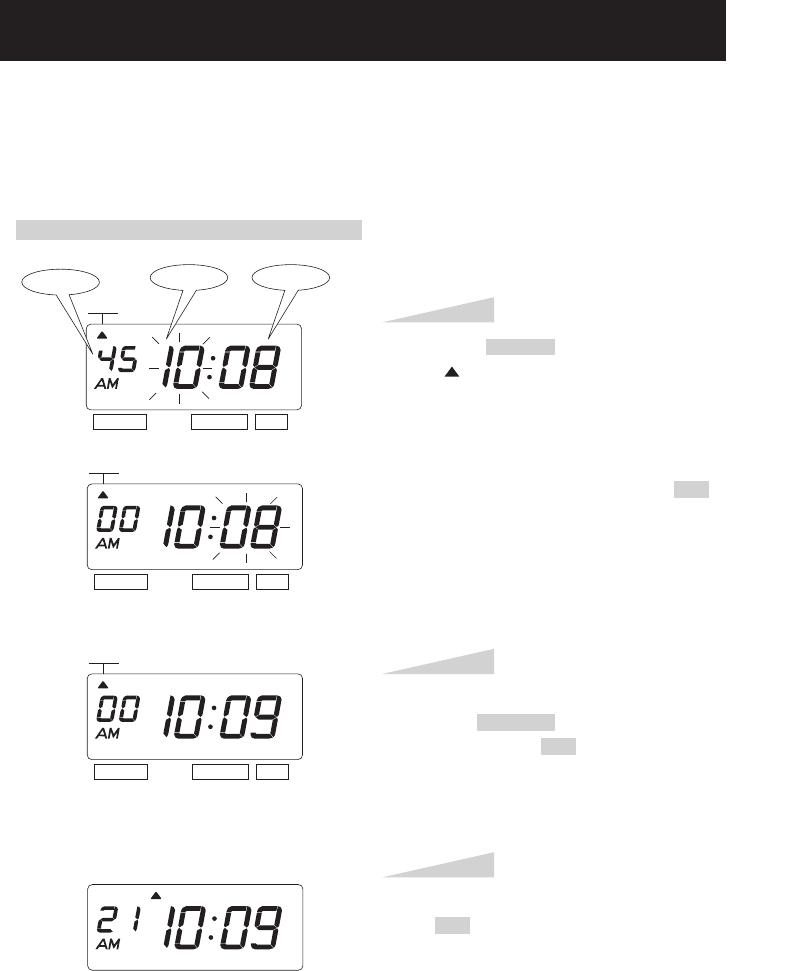
Example: Change the time from 10:08 to 10:09.
Press the SELECT button and position
the " " mark at the "TIME".
At that moment, the "Hour" flashes. (The
flashing means it can be changed.)
Change the "Hour".
In case of the example, press the SET
button because the hour is not to be
changed.
At that moment, the flashing changes
from "Hour" to "Minute".
Step 1
TIME
SELECT CHANGE SET
Change the "Minute".
Press the CHANGE button to set at "09",
and then press the SET button.
At that moment, the "Second" starts to
run from "00".
Step 2
TIME
SELECT CHANGE SET
SELECT CHANGE SET
TIME
After you finish setting the time, press
the SET button once again.
Now the time setting has been
completed. Replace the cover and lock.
IMPORTANT: If you do not complete
Step 3, the clock will not print.
Step 3
TU WE TH FR SA SUMO
Second
Hour
Minute
ENGLISH
10
SETTING THE DATE
Example: Change the date from October 20, 2014 to October 21, 2014.
Press the SELECT button and position
the " " mark at the "DATE".
At that moment, the "Year" flashes. (The
flashing means it can be changed.)
Change the "Year".
In case of the example, press the SET
button because the year 2014 is not to be
changed.
At that moment, the flashing changes
from "Year" to "Month".
Step 1
DATE
SELECT CHANGE SET
DATE
SELECT CHANGE SET
DATE
SELECT CHANGE SET
DATE
SELECT CHANGE SET
Change the "Month".
In case of the example, press the SET
button because the month is not to be
changed.
At that moment, the flashing changes
from "Month" to "Date".
Step 2
Change the "Date".
Press the CHANGE button to set at "21",
and then press the SET button.
Step 3
After you finish setting the date, press
the SET button once again.
Now the date setting has been completed.
Replace the cover and lock.
IMPORTANT: If you do not complete
Step 4, the clock will not print.
Step 4
TU WE TH FR SA SUMO
Year
Month
Date
13
11
