


5. Disconnect the front audio and USB assembly cables from the system board. See “Locating parts on
the system board” on page 13.
Note: Ensure that you note the locations of the cables when you disconnect the cables from the
system board.
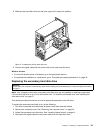
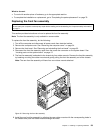
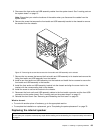
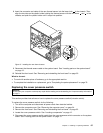
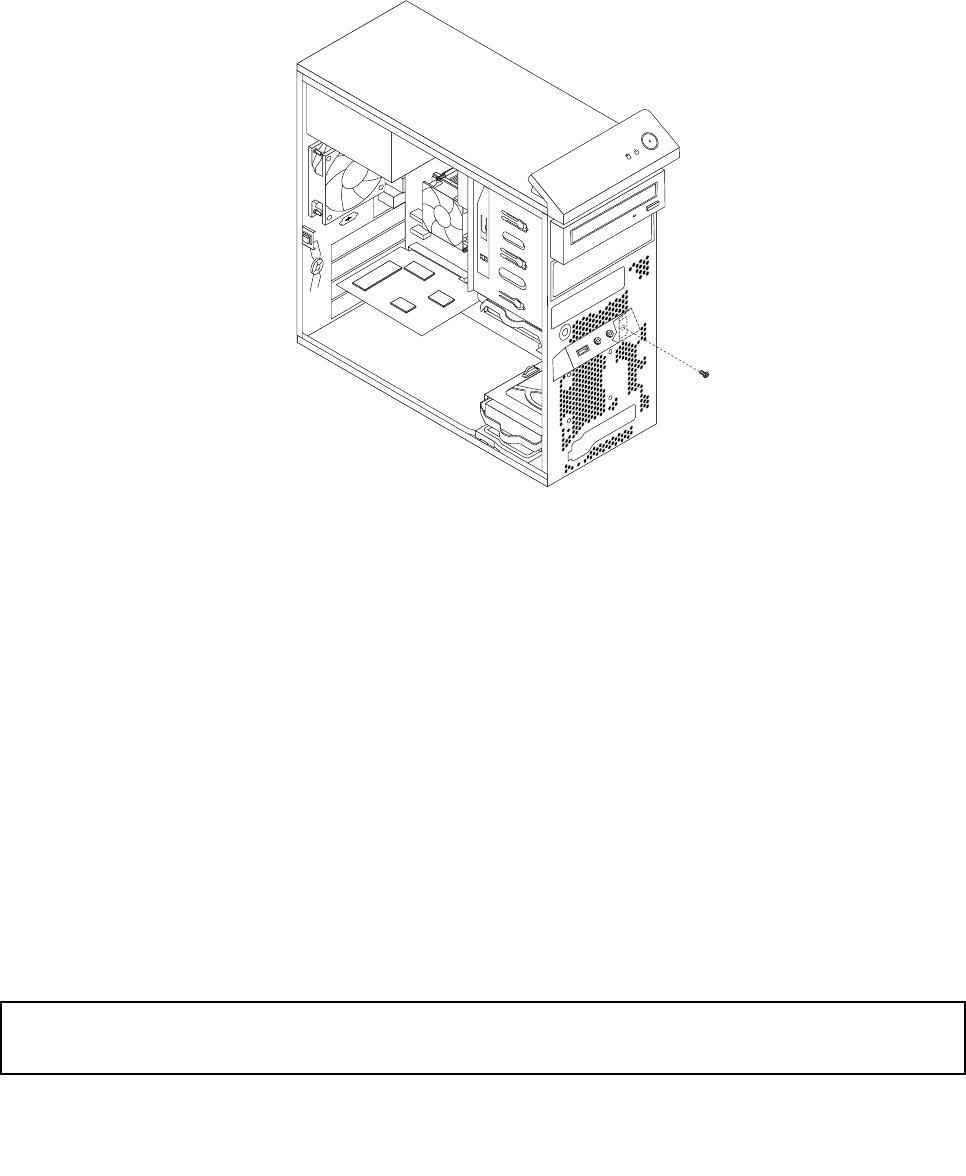
6. Remove the screw that secures the front audio and USB assembly bracket to the chassis to remove
the bracket from the chassis.
Figure 47. Removing the screw that secures the front audio and USB assembly to the chassis
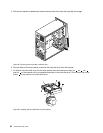
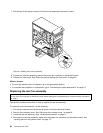
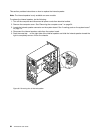
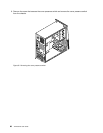
7. Remove the two screws that secure the front audio and USB assembly to its bracket and remove the
failing front audio and USB assembly from the bracket.
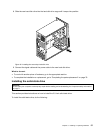
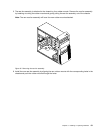
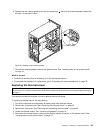
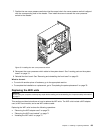
8. Install a new front audio and USB assembly into the bracket and install the two screws to secure the
front audio and USB assembly to the bracket.
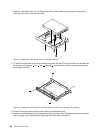
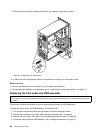
9. Install the front audio and USB assembly bracket into the chassis and align the screw hole in the
bracket with the corresponding hole in the chassis.
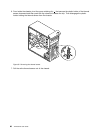
10. Install the screw to secure the bracket to the chassis.
11. Reconnect the front audio and USB assembly cables to the front audio connector and the front USB
connector on the system board. See “Locating parts on the system board” on page 13.
12. Reinstall the front bezel. See “Removing and reinstalling the front bezel” on page 35.
What to do next:
• To work with another piece of hardware, go to the appropriate section.
• To complete the installation or replacement, go to “Completing the parts replacement” on page 79
.
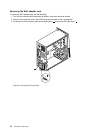
Replacing the internal speaker
Attention:
Do not open your computer or attempt any repair before reading and understanding the “Important safety information”
on page v.
Chapter 5. Installing or replacing hardware 63