


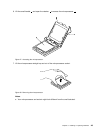

2. Place a soft, clean towel or cloth on the desk or surface. Hold the sides of your computer and gently lay
it down so that the screen is against the surface and the cover is facing up.
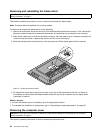
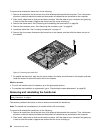
3. Remove the computer cover. See “Removing the computer cover” on page 36.
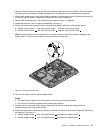
4. Locate the hard disk drive in the computer. See “Locating components” on page 12.
5. Do one of the following:
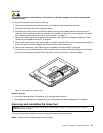
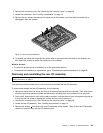
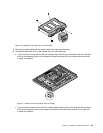
• If your computer comes with the 20-inch display, press the clips of the hard disk drive bracket inward
and then slide the hard disk drive upward to remove it from the chassis.
Figure 18. Removing the hard disk drive (20-inch display)
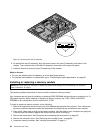
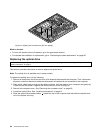
• If your computer comes with the 23-inch display, press the clips of the hard disk drive bracket inward
and then slide the hard disk drive to the left to remove it from the chassis.
Figure 19. Removing the hard disk drive (23-inch display)
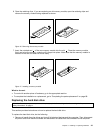
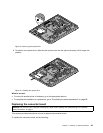
6. Disconnect the signal cable and the power cable from the hard disk drive.
7. Flex the sides of the hard disk drive bracket properly to remove the hard disk drive out of the bracket.
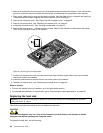
8. To install the new hard disk drive into the bracket, ex the bracket and align pin 1 , pin 2 , pin 3 , and pin
4 on the bracket with the corresponding holes in the hard disk drive.
42 ThinkCentre User Guide