


Enabling DMA
This section explains enabling the DMA setting with Windows 2000 and Windows
XP.
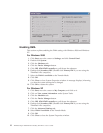
For Windows 2000
1. Click Start, move the cursor to Settings, and click Control Panel.
2. Double-click System.
3. Click the Hardware tab.
4. Click the Device Manager button.
5. Click IDE ATA/ATAPI controller to pull down the submenu.
6. Double-click Secondary IDE. (Double-click Primary IDE if you are using the
ThinkPad A21e computer.)
7. Select the DMA is available as the Transfer Mode.
8. Click OK.
9. Click Close to close System Properties window. A message displays, informing
you that the system settings have changed.
10. Click OK to restart the system.
For Windows XP
1. Click Start, move the cursor to My Computer, and click on it.
2. Click on View system information under System Tasks.
3. Click the Hardware tab.
4. Click the Device Manager button.
5. Click IDE ATA/ATAPI controller to pull down the submenu.
6. Double-click Secondary IDE. (Double-click Primary IDE if you are using the
ThinkPad A21e computer.)
7. Click the Advanced Settings tab.
8. Select DMA if available as the Transfer Mode.
9. Click OK.
10. Click Close to close the System Properties window.
12 ThinkPad Super Multi-Burner Ultrabay Slim Drive: User’s Guide