


1. Remove all media from the drives and turn off all attached devices and the computer. Then, disconnect
all power cords from electrical outlets and disconnect all cables that are connected to the computer.
2. Remove the computer cover. See “Removing the computer cover” on page 14.
3. Remove the front bezel. See “Removing and reinstalling the front bezel” on page 14.
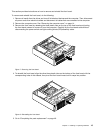
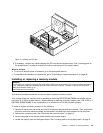
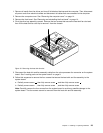
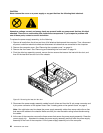
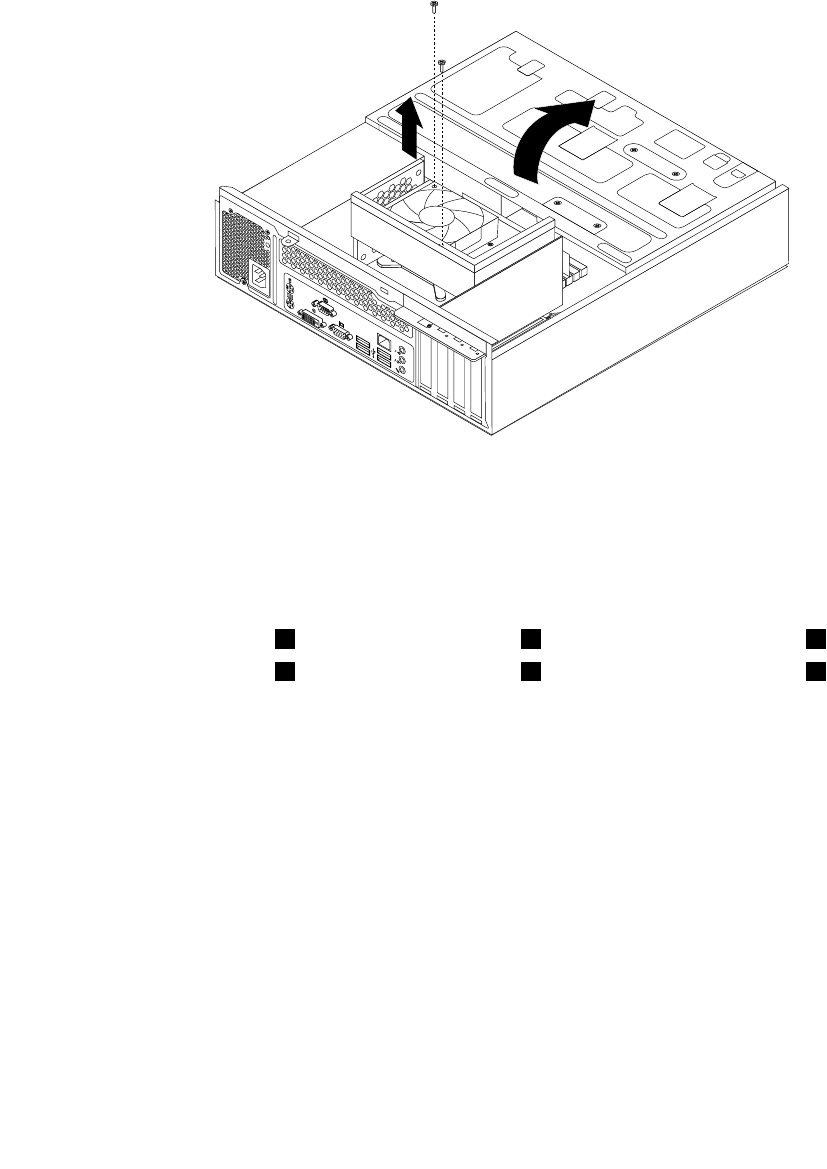
4. Pivot the drive bay assembly upward. Remove the two screws that secure the heat sink fan duct and
then lift the heat sink fan duct up to remove it from the chassis.
Figure 18. Removing the heat sink fan duct
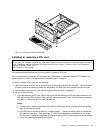
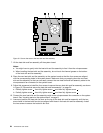
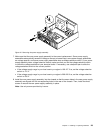
5. Disconnect the heat sink and fan assembly cable from the microprocessor fan connector on the system
board. See “Locating parts on the system board” on page 9
.
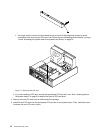
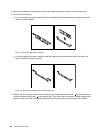
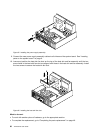
6. Follow this sequence to remove the four screws that secure the heat sink and fan assembly to the
system board:
a. Partially remove screw 1 , then fully remove screw 2 , and then fully remove screw 1 .
b. Partially remove screw 3 , then fully remove screw 4 , and then fully remove screw 3 .
Note: Carefully remove the four screws from the system board to avoid any possible damage to the
system board. The four screws cannot be removed from the heat sink and fan assembly.
Chapter 2. Installing or replacing hardware 23