


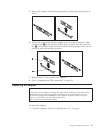
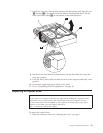
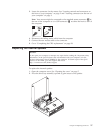


2. Make sure that the cables are routed correctly before lowering the drive bay
assembly.
3. Lower the drive bay assembly and position the drive locks to the locked
position. Otherwise, you cannot close the computer cover.
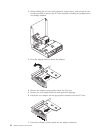
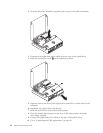
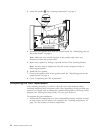
4. Close the computer cover.
5. Re-installed any locking devices, such as a Kensington lock, that secure the
computer cover.
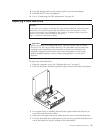
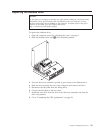
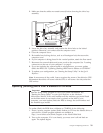
6. If your computer is being placed in the vertical position, attach the floor stand.
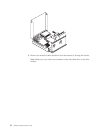
7. Reconnect the external cables and power cords to the computer. See “Locating
connectors on the rear of your computer” on page 3.
8. If you are replacing the system board or microprocessor, you must update
(flash) the BIOS. See “Updating (flashing) BIOS from a diskette or CD-ROM.”
9. To update your configuration, see ″Starting the Setup Utility″ in the Quick
Reference.
Note:
In most areas of the world, Lenovo requires the return of the defective CRU.
Information about this will come with the CRU or will come a few days after the
CRU arrives.
Updating (flashing) BIOS from a diskette or CD-ROM
Important
Start the Setup Utility program to view your system information. See
“Starting the Setup Utility” in your Quick Reference or the Hardware
Maintenance Manual. If the serial number and the machine type/model listed
on the Main menu do not match what is printed on the label of your
computer, you must update (flash) the BIOS to change the serial number and
the machine type/model.
To update (flash) the BIOS from a diskette or CD-ROM, do the following:
1. Insert a system program update (flash) diskette or CD into the diskette drive or
optical drive. System program updates are available at
http://www.lenovo.com/think/support on the World Wide Web.
2. Turn on the computer. If it is on already, you must turn it off and back on
again. The update begins.
Chapter 2. Replacing hardware 29