


Replacing the power supply assembly
Attention
Do not open your computer or attempt any repair before reading the “Important safety
information” in the Safety and Warranty Guide that was included with your computer. To
obtain a copy of the Safety and Warranty Guide, go to the Support Web site at
http://www.lenovo.com/support.
This section provides instructions on how to replace the power supply assembly.
1. Remove the computer cover. See “Removing the cover” on page 11.
Note:
For this procedure, it helps to lay the computer on its side.
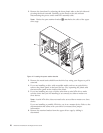
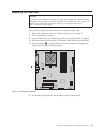
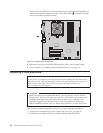
2. Disconnect the power supply cables from the system board and from all drives.
See “Identifying parts on the system board” on page 9.
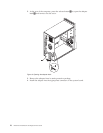
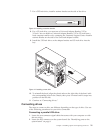
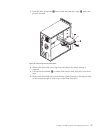
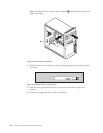
3. Remove the four screws at the rear of the chassis that secure the power supply.
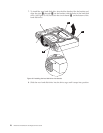
4. Lift the power supply out of the chassis.
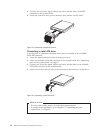
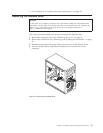
5. Install the new power supply into the chassis so that the screw holes in the
power supply align with those in the chassis.
6. Install the four screws to secure the power supply assembly.
Note: Use only the screws provided by Lenovo.
7. Reconnect all the power supply cables to the drives and the system board.
8. Go to Chapter 4, “Completing the parts replacement,” on page 43.
Figure 19. Removing the power supply screws
24 Hardware Installation and Replacement Guide