For Macintosh users
1 Close all open software applications.
2 Insert the Software and Documentation CD.
3 From the Finder desktop, double-click the printer CD icon that automatically appears.
4 Double-click the Install icon.
5 Follow the instructions on the screen.
Using the World Wide Web
1 Go to the Lexmark Web site at www.lexmark.com.
2 From the Drivers & Downloads menu, click Driver Finder.
3 Select your printer, and then select your operating system.
4 Download the driver and install the printer software.
Updating available options in the printer driver
Once the printer software and any options are installed, it may be necessary to manually add the options in the printer
driver to make them available for print jobs.
For Windows users
1 Click , or click Start and then click Run.
2 In the Start Search or Run box, type control printers.
3 Press Enter, or click OK.
The printer folder opens.
4 Select the printer.
Note: If the printer has a fax option, choose the appropriate printer model with the letters “PS.”
5 Right-click the printer, and then select Properties.
6 Click the Install Options tab.
7 Under Available Options, add any installed hardware options.
Note: If the printer has a fax option, select Fax and then add it as an installed option.
8 Click Apply.
Setting up wireless printing
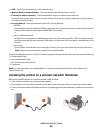
Information you will need to set up the printer on a wireless
network
Note: Do not connect the installation or network cables until prompted to do so by the setup software.
Additional printer setup
35


