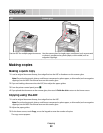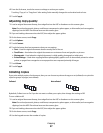
4 From the Scale area, touch the arrows to enlarge or reduce your copies.
Touching “Copy to” or “Copy from” after setting Scale manually changes the scale value back to Auto.
5 Touch Copy It.
Adjusting copy quality
1 Load an original document faceup, short edge first into the ADF or facedown on the scanner glass.
Note: Do not load postcards, photos, small items, transparencies, photo paper, or thin media (such as magazine
clippings) into the ADF. Place these items on the scanner glass.
2 If you are loading a document into the ADF, then adjust the paper guides.
3 On the home screen, touch Copy.
4 Touch Options.
5 Touch Content.
6 Touch the button that best represents what you are copying:
• Text—Used for original documents that are mostly text or line art
• Text/Photo—Used when the original documents are a mixture of text and graphics or pictures
• Photograph—Used when the original document is a high-quality photograph or inkjet print
• Printed Image—Used when copying halftone photographs, graphics such as documents printed on a laser
printer, or pages from a magazine or newspaper that are composed primarily of images
7 Touch Done.
8 Touch Copy It.
Collating copies
If you print multiple copies of a document, then you can choose to print each copy as a set (collated) or to print the
copies as groups of pages (not collated).
Collated Not collated
By default, Collate is set to On. If you do not want to collate your copies, then change the setting to Off.
To turn collation off:
1 Load an original document faceup, short edge first into the ADF or facedown on the scanner glass.
Note: Do not load postcards, photos, small items, transparencies, photo paper, or thin media (such as magazine
clippings) into the ADF. Place these items on the scanner glass.
2 If you are loading a document into the ADF, then adjust the paper guides.
3 On the home screen, touch Copy.
4 Use the keypad to enter the number of copies.
Copying
97


