


Using the Coverage Estimator
86
Administrative support
Using the Coverage Estimator
The Coverage Estimator provides you with an estimate of the percent coverage of cyan, magenta, yellow, and black toner
on a page. These estimates are printed on the page.
To turn on the Coverage Estimator utility:
1 Make sure your printer is on.
2 Press on the operator panel.
3 Press until Settings appears, and then press .
4 Press until Utilities Menu appears, and then press .
5 Press until you see On, and then press .
The utility can be turned off from the operator panel or by turning the printer off.
The Coverage Estimator utilizes an algorithm that counts pixels for each toner color: black, cyan, magenta, and yellow.
Once the utility is turned on, the printer prints the percent coverage for each color on each page of the job.
The Coverage Estimator is only intended to estimate the coverage on a given page. For all toner colors that are used, the
minimum percentage that prints is 2 percent. Reported values may vary from printer to printer. The accuracy of the
estimates may be affected by how full the print cartridges are, environmental conditions, the media type, the software
application, software settings, the driver, driver settings, and the content of the page. Lexmark makes no claim as to the
accuracy of the estimated percents.
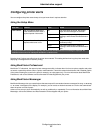
Size sensing
The Size Sensing menu item lets you disable or enable auto size sensing on trays. Size Sensing also lets the printer detect
the difference between similar paper sizes that it otherwise cannot.
Size sensing is on by default for all the trays. However, the trays cannot automatically sense transparencies.
Disabling size sensing
1 Turn the printer off.
2 Press and hold and while turning the printer on.
3 Release both buttons when Performing Self Test appears on the display.
The printer performs its power-on sequence, and then Config Menu appears on the first line of the display.
Press until Size Sensing appears, and then press .
Note: Only paper trays that support auto size sensing are displayed on the operator panel.
4 Press until Tray <x> Sensing appears, where <x> represents the number of the tray for which you want
to disable size sensing, and then press .
Repeat for other trays, if necessary.
5 Press until Off appears, and then press .
Saved briefly appears. Config Menu appears again with Size Sensing on the second line.
6 Press .
7 Press until Exit Config Menu appears, and then press .
Activating Menu Changes briefly appears, followed by Performing Self Test. The printer returns to the
Ready message.