


40
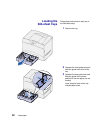
Attach cables
Local printing You can attach your printer locally using either the USB port or
parallel port.
Note: All Windows operating
systems support parallel
connections. However, only the
Windows 98, Windows Me, and
Windows 2000 operating
systems support USB
connections. Some UNIX, Linux,
and Macintosh computers also
support USB connections. Refer
to your computer documentation
to see if your system supports
USB.
• A USB port is standard on all Lexmark C750 printer models.
We recommend Lexmark USB cable part number 12A2405
(2 m).
• A parallel port requires an IEEE-1284 compliant parallel cable,
such as Lexmark part number 1329605 (10 ft) or 1427498
(20 ft).
If you install an optional USB/Parallel Interface Card to the
Lexmark C750n, Lexmark C750in, or Lexmark C750dn, you need a
1284 A-C parallel cable, such as Lexmark part number 43H5171
(9.8 ft), or a USB cable such as Lexmark part number 12A2405 (2 m).
If you have installed an optional Tri-Port Adapter, you can locally
attach the printer with a serial cable. We recommend Lexmark part
number 1038693 (50 ft). For details on LocalTalk or infrared
connections, refer to the documentation that shipped with the Tri-Port
Adapter.
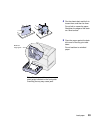
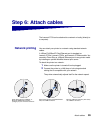
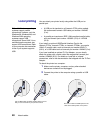
To attach the printer to a computer:
1 Make sure the printer, computer, and any other attached
devices are turned off and unplugged.
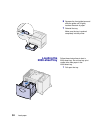
2 Connect the printer to the computer using a parallel or USB
cable.
Use an IEEE-1284 compliant parallel cable to ensure
that you can access all of your printer functions.
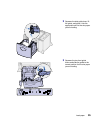
Be sure to match the USB symbol on the
cable to the USB symbol on the printer.