


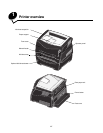


19
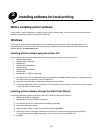
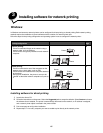
Macintosh
Printing a network setup page
You need to print the menu settings page. If your printer is set up on a network, you also need to print the network setup
page. If your printer is locally attached, you also need to print a test page.
Follow these steps to print both the menu settings page and the network setup page.
1 Make sure the printer is on, and briefly press the operator panel button to print the page.
2 On the menu settings page:
• Verify that the options you installed are correctly listed under “Installed Features.”
If an option is not listed under Installed Features, turn off the printer, unplug the power cord, and reinstall the
option.
• Verify the amount of memory installed is correctly listed under “Printer Information.”
• Verify that the paper trays are configured for the sizes and types of paper you loaded.
Note: Save the network setup page after it prints. You will use it in the other steps.
3 On the network setup page, confirm that Status is “Connected.”
If Status is “Not Connected,” your LAN drop may not be active or your network cable may be malfunctioning.
Consult your network support person for a solution, and then print another network setup page to verify that you
are connected to your network.
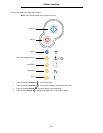
Verifying the IP settings
1 Print another network setup page. Look under the “TCP/IP” heading, and make sure the IP address, netmask, and
gateway are what you expected. See How to print the menu settings and network setup pages on page 85
for more information.
Note: To display a command prompt on a Windows computer, click Start
Æ Programs Æ Command
prompt (or Accessories
Æ Command prompt if using Windows 2000).
Ping the printer, and verify that it responds. For example, at a command prompt on a network computer, type ping followed
by the new printer IP address (for example, ping 192.168.0.11). If the printer is active on the network, you should receive
a reply.
Macintosh
To print to a network printer, each Macintosh user must install a custom PostScript Printer Description (PPD) file, and either
create a desktop printer on the computer (Mac OS 9.x) or create a print queue in Print Center (Mac OS X).
Note: A PostScript Printer Description (PPD) file provides detailed information about the capabilities of a
printer to UNIX or Macintosh computers.
Mac OS X
Step 1: Install a custom PPD file
1 Install a PostScript Printer Description (PPD) file on the computer.
a Insert the drivers CD.
b Double-click the installer package for the printer.
c Click Continue on the Welcome screen and again after viewing the Readme file.