


ADJUST THE COLOR ALIGNMENT
1 Turn the printer off.
2 Load letter- or A4-size paper in the tray.
3 Hold down and while turning the printer on.
4 Release the buttons when the screen with the progress bar appears.
The printer performs a power-on sequence, and then the Configuration menu appears.
5 Touch the down arrow until Color Alignment appears.
6 Touch Color Alignment.
7 Touch Color Alignment again.
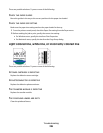
The color alignment pages print.
8 Touch the down arrow until Color Alignment appears, and then touch Color Alignment.
9 From the printed sheet, find the straightest of the 20 lines beside the letter A.
10 Touch the left or right arrow to select that number.
11 Repeat steps 9 and 10 to align sets B through L.
12 Touch Back.
13 Touch Exit Config Menu.
Note: If the issue is not resolved, then recalibrate again. If necessary, adjust the color alignment again.
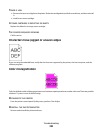
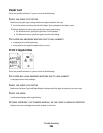
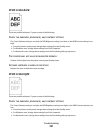
Clipped images
These are possible solutions. Try one or more of the following:
CHECK THE GUIDES
Move the width and length guides in the tray to the correct positions for the paper size loaded.
CHECK THE PAPER SIZE SETTING
Make sure the paper size setting matches the paper loaded in the tray:
1 From the printer control panel, check the Paper Size setting from the Paper menu.
2 Before sending the job to print, specify the correct size setting:
• For Windows users, specify the size from Print Properties.
• For Macintosh users, specify the size from the Page Setup dialog.
Fine horizontal lines appear on color pages
You may notice fine, horizontal lines in photographs or pages with a high concentration of color. This can occur when
the printer is in Quiet Mode. To fix this, set Quiet Mode to Off (Image/Photo).
Troubleshooting
293