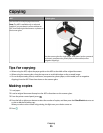
Copying photos
1 Load photo paper.
2 Place a photo facedown on the scanner glass.
3 From the printer control panel, press .
4 Press the up or down arrow button to scroll to Photo Reprint.
5 Press the left or right arrow button to select the desired photo size.
6 Press .
Note: For best results, allow the prints to dry at least 24 hours before stacking, displaying, or storing.
Making a duplex copy automatically
The automatic duplex unit, available only on selected printer models, supports letter- and A4-size paper. If you
purchased a model without automatic duplex, or if you need to make duplex copies using other paper sizes, then
see the instructions for making a duplex copy manually.
Note: You cannot make duplex copies on envelopes, card stock, or photo paper.
1 Load paper.
2 Load an original document faceup into the ADF or facedown on the scanner glass.
3 From the printer control panel, press .
4 Press the up or down arrow button to scroll to 2-Sided Copies.
5 Choose the duplex option that matches your original document:
• If you are copying a one-sided document, then press the left or right arrow button to scroll to 1 to 2.
• If you are copying a two-sided document, then press the left or right arrow button to scroll to 2 to 2.
6 Press to save the first page of the document to the printer memory.
7 Follow the instructions on the display.
Canceling copy jobs
To cancel a copy job, press .
Scanning stops and the printer returns to the previous menu.
Copying
26


