5
Load
Capacity
Battery
Fault
Normal
Off
Test / Reset
Lift Here to
Remove Inlay
Tower-Oriented
Template Inlay
GENERAL INSTALLATION GUIDELINES
NOTE: Use a utility receptacle with bonded neutral and ground to prevent UPS damage.
Damage due to faulty utility wiring is not covered by product warranty. The UPS will not
start with an incorrectly wired input AC supply, for example if the line and neutral wires are
reversed. In this situation, the UPS flashes all the LED indicators and sounds an alarm on
start-up.
High input voltage (132 volts and above) on start-up, causes the UPS to flash the
”NORMAL” indicator and sound an audible alarm. Low or unavailable input voltage (105
volts and below) terminates start-up and causes the UPS to illuminate the ”FAULT”
indicator and the first two segments of the ”LOAD” bar indicator.
If you encounter any of these conditions, call a qualified electrician.
Place UPS in a location of unrestricted airflow. Maintain a minimum of 4 inches (10 cm)
clearance at the front and rear of the UPS. Maintain an ambient temperature range of 50’
to 95’ F (10° to 35° C). NOTE: UPS operation in ambient temperatures above 77° F (25°
C) reduces battery life.
Locate UPS where it cannot be accidentally turned off, in an area free of moisture,
flammable liquids, gases, or corrosives.
RACKMOUNT INSTALLATION
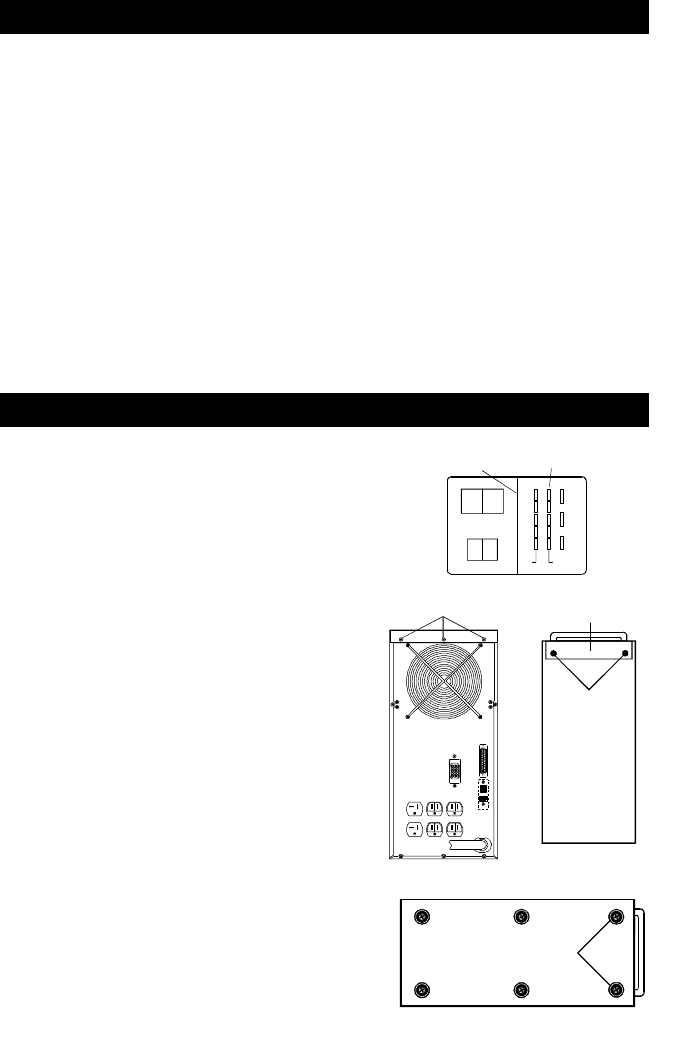
1. Turn the ON/OFF switch at the front of the
UPS OFF. Remove tower-oriented template
inlay from the front display area. The
rackmount-oriented designations are printed
on the UPS beneath the template inlay.
2. Remove the three top cover screws on the
rear of the UPS. Push the top cover towards
the rear of the UPS and lift off.
3. Remove the metal top cover support bracket.
Retain the two flange screws near the front
of the UPS.
4. Gently lay the unit on its right side (when
viewing the unit from the front) and remove
the six rubber feet. Retain the screws from
the two front feet to fasten securing flanges.
5. Liebert offers kits for UPS rail or slide
installation. Install the UPS on rackmount
rails, slides or shelves. Use the installation
instructions which came with your rackmount
kit.
6. Switch OFF load equipment and plug it into
the UPS output receptacles. Plug UPS into
a dedicated and grounded wall receptacle,
properly protected by a circuit breaker or
fuse. Use a 15 amp device for the 1000 VA
or 1500 VA units, and a 20 amp device for
2100 VA units. Turn ON the UPS.
Top Cover Screws
Rear View
Flange Screws
Top Cover
Support Bracket
Top View
(with top cover off)
Bottom View
Retain Screws
from front two feet


