


SP400C – 5
speaker connector (8) to the 4-pin terminal.
Tighten the strain relief screws to secure the
speaker cable or flexible conduit. Close the
terminal cover plate (7) and tighten the locking
screw (7a) firmly.
B.
Installation with Rigid Conduit
1
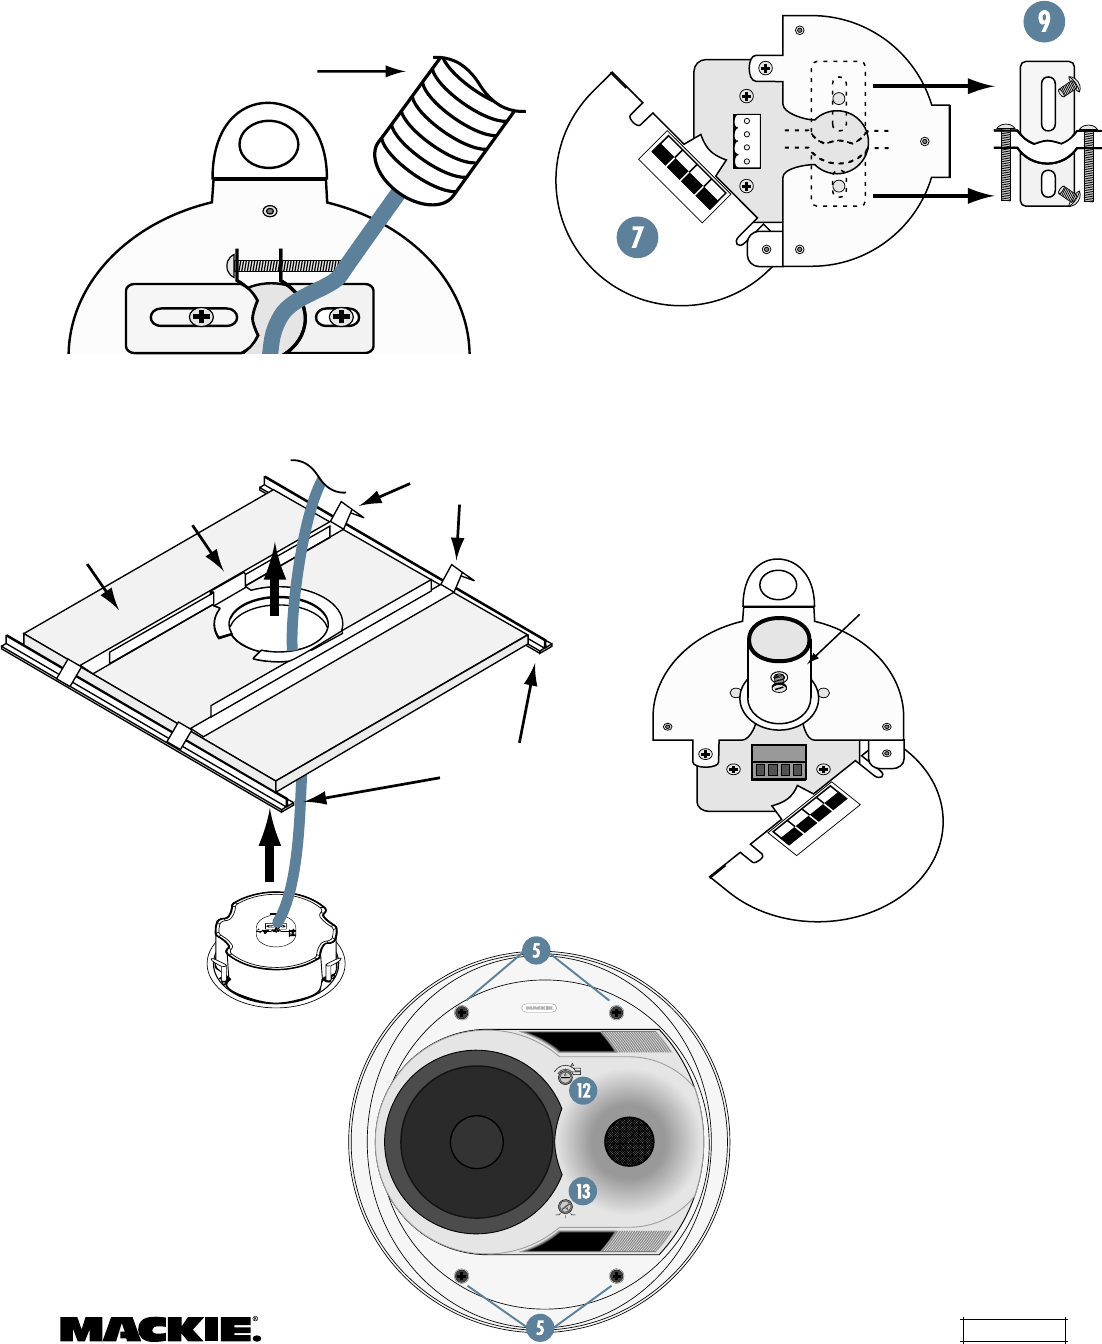
B1.Remove the two screws holding the strain relief
(9) onto the rear cover and remove the strain
relief assembly.
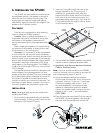
Support Rails
C-Ring
Ceiling Tile
T-Channels
Flexible
Conduit
A3.Insert the speaker into the hole all the way, so
the front baffle rim is flush against the ceiling.
3.7
7.5
15
30
70v
100v
HIGH
PASS
FULL
RANGE
FULL
RANGE
(16 OHMS)
7.5
15
30
A4.Turn the four attachment
screws (5) clockwise until
tight to secure the
mounting tabs over the
C-ring.
DO NOT
OVERTIGHTEN.
1234
+
LOOP
THRU
LOOP
THRU
IN IN
+ ––
B2.Open the terminal cover plate (7) on the back of
the SP400C. Use a threaded conduit set-screw
coupler (not supplied: For 1/2" conduit, use
Thomas&Betts Steel City model TC221-SC or UL
listed equivalent) and insert into the opening
exposed by removing the strain relief assembly.
B3.Fasten the coupler to the cover using the nut
supplied with the coupler.
1234
+
LOOP
THRU
LOOP
THRU
IN IN
+ –
–
Threaded Conduit
Set-Screw Coupler
(Thomas&Betts
Steel City
TC221-SC
or equivalent)
B4. Insert the speaker into the
hole all the way, so the front
baffle rim is flush against the
ceiling.
B5. Turn the four attachment
screws (5) clockwise until
tight to secure the mounting
tabs over the C-ring.
DO NOT
OVERTIGHTEN.
1
This method can be used with 1/2"
flexible conduit by substituting a
Thomas&Betts Steel City model
XC241 flexible conduit fitting (or UL
listed equivalent).