


• Setting Printer Alignment
10
Setting Printer Alignment
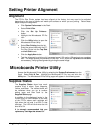
Alignment
The PF-Pro Disc Printer system has been aligned at the factory, but may need to be adjusted
depending on the type of media and media print surface on which you are printing. Follow these
steps to adjust the alignment:
• Click System Preferences in the Dock.
• Select Print & Fax.
• Click the Set Up Printers…
button.
• Highlight the Microboards PF-Pro
icon.
• Click the Utility button to open the
Microboards Printer Utility.
• Select Disc Printing from the list.
• Enter the values listed with the PF-
Pro Disc Printer into the Top Side
and Left Side boxes.
• Click the Apply Now button.
• Test the alignment by printing a full-coverage image (120 mm by 120 mm) onto an unprinted
disc. The image should print centered on the disc. If not, adjust the Top Side and Left Side
as necessary, verifying the alignment by printing the same image.
Microboards Printer Utility
Access the Microboards Printer Utility by selecting the System Preferences from the
Dock. Select Print & Fax. Highlight the Microboards PF-Pro icon and click the
Utility icon. The Microboards Printer Utility pages will appear in the following order.
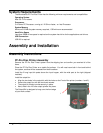
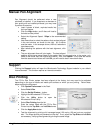
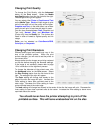
Supplies Status
The Supplies Status show how much
remains of all 4 colors, Cyan, Magenta,
Yellow, and Black. The values shown will
be refreshed when you go to another
setting page and then back to the
Supplies Status page.
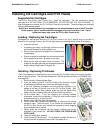
In addition to the displayed levels in the
Printer Utility, an LED indicator on the front
of the PF-Pro above each cartridge will
light when the ink level is at 25% in that
cartridge. The LED will blink when the ink
level is at 0%.
It is strongly recommended that you
replace any cartridge that shows 0%.