Operation 17
Operation
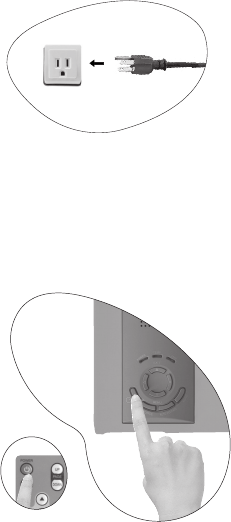
Start Up
1. Switch all of the connected equipment on.
2. Plug the power cord into the projector and into a wall socket.
• The provided power cord 120V is rated at 120 V. Never connect this cord to any outlet or
power supply using other voltages or frequencies than rated. If you want to use a power
supply using other voltage than rated, prepare an appropriate power cord separately.
3. Turn on the wall socket switch (where fitted).
4. Press and hold Power on the remote control or projector to start the unit. The Power
indicator light flashes green and stays green when the power is turned on.
5. The start up procedure takes about 30 seconds after pressing Power. In the later stage
of start up, a splash screen appears.
6. Then, the projector starts to search for input signals. Irrespective of selected input
source, the screen shows the selected source information at the bottom right corner of
the screen. If there is no input source detected, the three messages will be displayed on
the screen continuously: “RGB/YPbPr Searching”, “Video Searching” and “S-
Video Searching”.
7. You can also press SOURCE on the projector or remote control to select your desired
input signal. For more information, please refer to page 20.
Important:
If the frequency/ resolution of the input signal exceeds the projector’s operating range, you
will see the message “Out of Range” displayed on a blank screen.
Ex.


