


CA-132/132I User’s Manual
2-2
Hardware Installation
The hardware installation of CA-132/132I serial boards is easy to carry out. Before you insert
CA-132/132I into the PC/104 interface, you must first configure the RS-422/485 setting, I/O Base
Address & Interrupt Vector, and IRQ Settings. Follow the detailed steps given below to install the
CA-132/132I serial board in your computer.
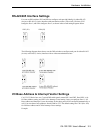
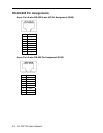
Step 1: Configure the RS-422/485 setting, I/O Base Address & Interrupt Vector, and IRQ Settings
(see details below).
Safety First!
To avoid damaging your system and boards, make sure your PC’s power is turned off before installing
your CA-132/132I board.
Step 2: Turn your PC’s power off, and also shut off the power to any peripheral devices, and remove
the PC’s cover.
Step 3: Insert the CA-132/132I serial board into the PC/104 interface slot.
Step 4: Fasten the holding screw to fix the serial board in place.
Step 5: Replace the PC’s cover.
Step 6: Power on the PC.
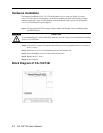
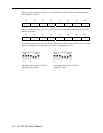
Block Diagram of CA-132/132I