


Chapter 2 Configuring and Installing the SCXI Chassis
SCXI Chassis User Manual 2-10 ni.com
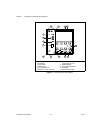
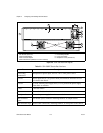
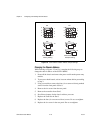
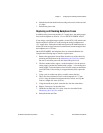
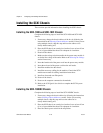
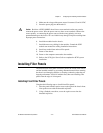
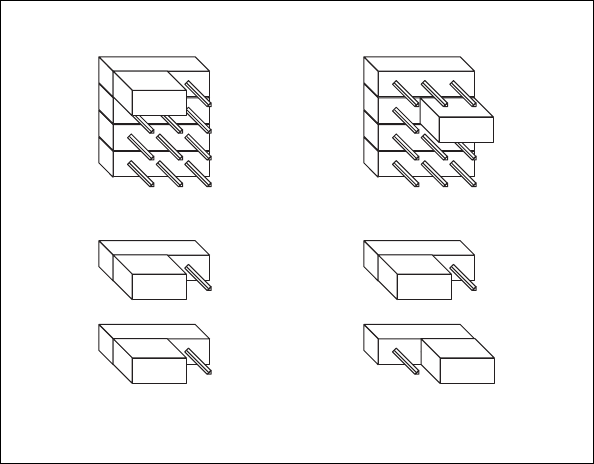
Figure 2-8. SCXI-1000DC Chassis Address Jumper Settings
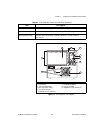
Changing the Chassis Address
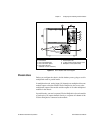
While referring to Figures 2-2 and 2-6, complete the following steps to
change the chassis address of the SCXI-1000DC:
1. Power off the chassis and remove the power cord from the power entry
module.
2. To prevent a shock hazard, wait at least one minute before proceeding
to step 3.
3. Using a screwdriver, remove the four (six on some revisions) panhead
screws from the front panel of Slot 0.
4. Remove the six screws from the rear panel.
5. Remove the controller from Slot 0.
6. Set all three jumpers for the chassis address you want.
7. Replace the controller in Slot 0.
8. Replace the four (six on some revisions) screws. Do not overtighten.
9. Replace the six screws in the rear panel. Do not overtighten.
W3
+16
W3
+16
W2
+8
W2
+8
0
2
4
6
W1
1
3
5
7
0
2
4
6
W1
1
3
5
7
Chassis Address 0
Factory Setting
Chassis Address 19
Example Setting