


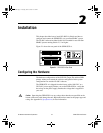


Chapter 2 Installation
© National Instruments Corporation 2-9 GPIB-SCSI-A for Solaris
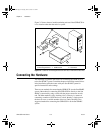
Whether you are using a direct connection or daisy-chaining, there are four
basic steps to connecting the GPIB-SCSI-A.
1. Shut down your system and turn off your computer.
2. Connect the cables.
3. Switch on your GPIB-SCSI-A.
4. Power on your system.
Step 1. Shut Down the System
Complete the following steps to shut down your system:
1. Enter the
shutdown
command and turn off your computer. (You need
super-user privilege to do a shutdown.)
2. Unplug the power cord from the power outlet.
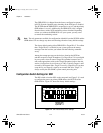
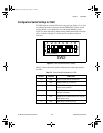
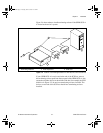
Step 2. Connect the Cables
Caution
Never connect or disconnect SCSI cables when any device (computer, tape drive,
GPIB-SCSI-A, and so on) is powered on. Doing so can cause fuses to blow inside the
GPIB-SCSI-A and inside other SCSI devices that supply termination power (TERMPWR)
to the SCSI bus.
Complete the following steps to connect the cables:
1. Connect the SCSI cable to the GPIB-SCSI-A and fasten it securely.
Connect the other end to your SCSI system. Be sure to use only
shielded SCSI cables. Total cable length in your SCSI system should
be less than 6 m, and terminating resistors should be installed on both
ends, as described earlier in this chapter.
2. Connect the GPIB cable to the GPIB-SCSI-A and tighten the thumb
screws on the connector. Connect the other end to your GPIB system.
Be sure to use only shielded GPIB cables. Total cable length in your
GPIB system should be less than 20 m, with a maximum separation
of 4 m between any two devices. You should have no more than
15 devices in a GPIB system, and at least two-thirds of those devices
must be powered on.
3. Plug the power cord into an AC outlet of the correct voltage.
GS.book Page 9 Tuesday, June 12, 2001 2:17 PM