


E–27
R
GB
STATUS
POWER
ON/
STAND BY
SOURCE
3.OPERATION
A
C
I
N
P
C
C
A
R
D
U
S
B
V
I
D
E
O
S
-
V
I
D
E
O
R
G
B
A
U
D
I
O
P
C
C
O
N
T
R
O
L
M
E
N
U
E
N
T
E
R
C
A
N
C
E
L
S
E
L
E
C
T
A
U
T
O
A
D
J
U
S
T
P
C
C
A
R
D
A
C
C
E
S
S
S
T
A
T
U
S
P
O
W
E
R
O
N
/
S
T
A
N
D
B
Y
S
O
U
R
C
E
1
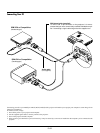
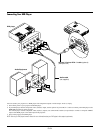
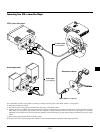
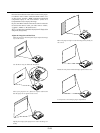
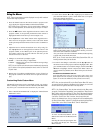
Connect the supplied power cable to the projector.
2
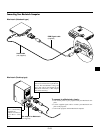
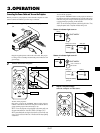
Turn on and off the Projector
3
Connecting the Power Cable and Turn on the Projector
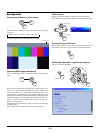
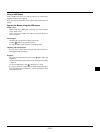
POWER ON/STAND BY button
Indicator
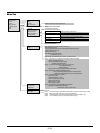
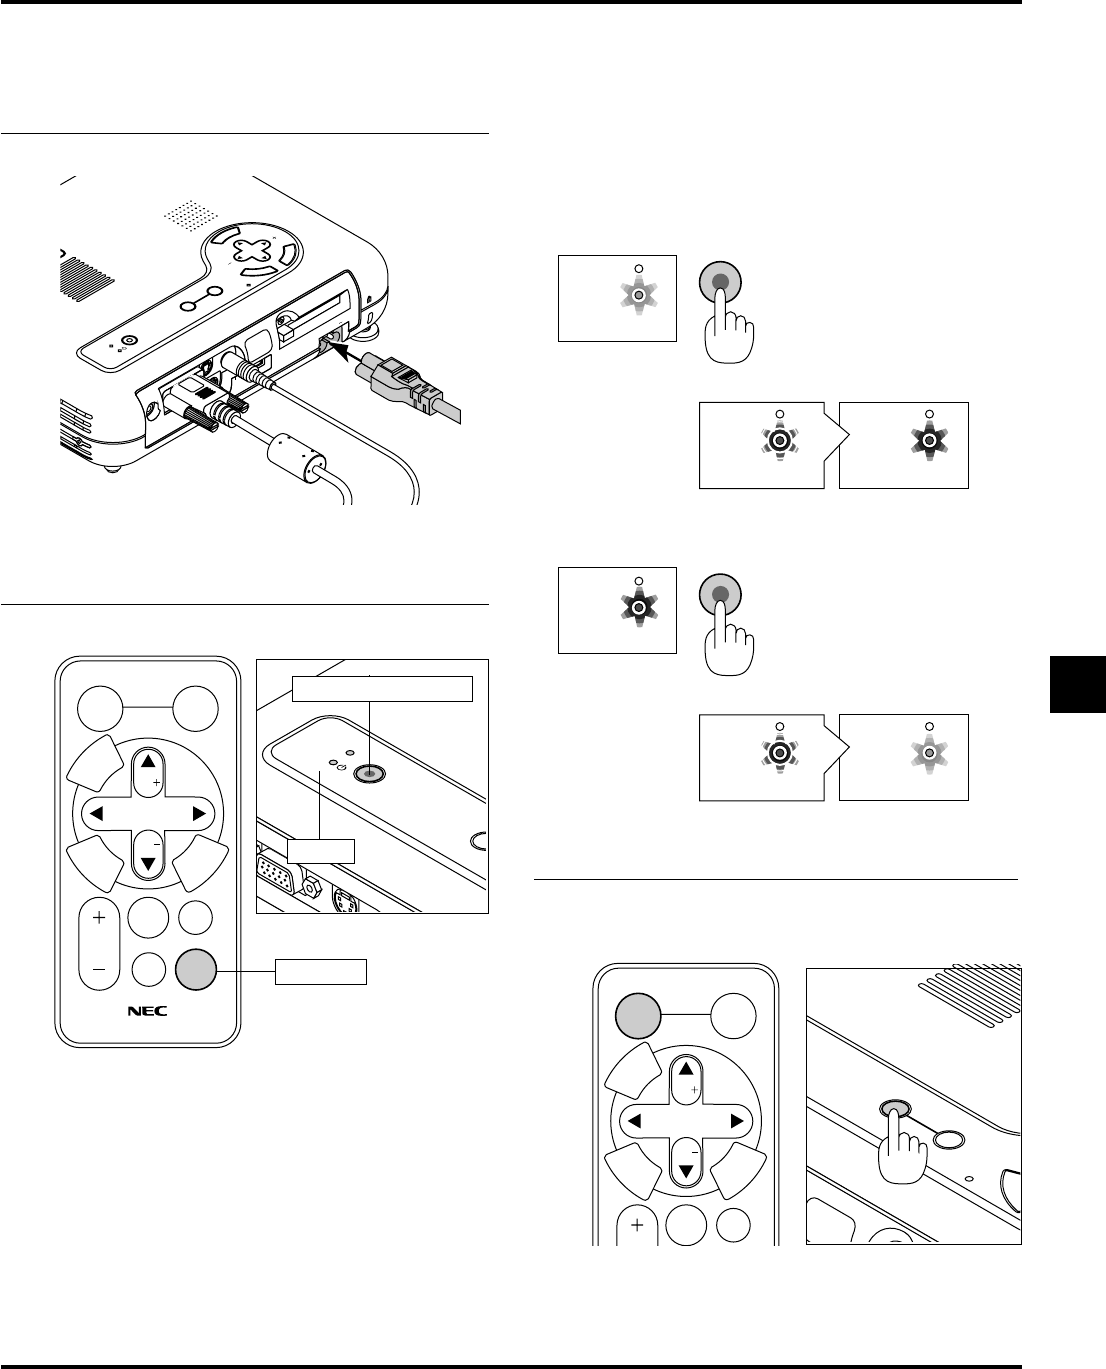
To turn on the projector:
Only after you press the “POWER” button on the projector
cabinet or the remote control will the power indicator turn to
green and the projector become ready to use.
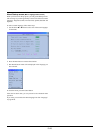
NOTE: To turn the projector on by plugging in the power cable, use
the menu and enable the “Auto Start” feature. (See page E-42.)
NOTE: Immediately after turning on the projector, screen flicker may
occur. This is not a fault. Wait 3 to 5 minutes until the lamp lighting
is stabilized.
Power button
To turn off the projector:
First press the “POWER” button on the projector cabinet or
the remote control for a minimum of two seconds. The power
indicator will glow orange. After the projector turns off, the
cooling fans keep operating for 90 seconds.
NOTE: Do not disconnect the power cable during this time. Then,
unplug the power cable. The power indicator will go out.
SELECT
Vol.
Vol.
POINTER
POWER
HELP
RD-366E
PIC.
MUTE
MAGNIFY
SOURCE
AUTO
ADJ.
M
E
N
U
E
N
T
E
R
C
A
N
C
E
L
POWER
STATUS
POWER
STATUS
ON
/
STAND BY
POWER
STATUS
POWER
STATUS
POWER
STATUS
ON
/
STAND BY
POWER
STATUS
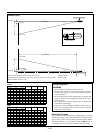
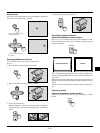
Status of indicator light: turn on
stand by
flashing 3 to 5 minutes
steady light
Status of indicator light: turn off
steady orange light
flashing green light steady green light
ON
cooling down
stand by
steady green light
change to flashing
green light
steady orange light
press a minimum of
two seconds
SELECT
Vol.
Vol.
POINTER
PIC.
MUTE
SOURCE
AUTO
ADJ.
M
E
N
U
E
N
T
E
R
C
A
N
C
E
L
E
N
T
E
R
A
U
T
O
A
D
J
U
S
T
P
C
C
A
R
D
A
C
C
E
S
S
O
N
/
A
N
D
B
Y
S
O
U
R
C
E
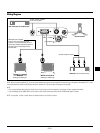
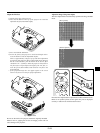
Select the Computer or Video Source
Adjust a Projected Image
Plug the supplied power cable in the wall outlet. The projec-
tor will go into its standby mode and the power indicator will
glow orange.
Before you turn on your projector, ensure that the computer or video
source is turned on and that your lens cap is removed.