56
4. Using the Viewer
❸ Projecting images stored in a USB memory device
ThissectionexplainsthebasicoperationoftheViewer.
TheexplanationprovidestheoperationalprocedurewhentheViewertoolbarissettothefactorydefault.
Preparation:BeforestartingtheViewer,storeimagestotheUSBmemoryusingyourcomputer.
Starting the Viewer
1. Turnontheprojector.(→page14)
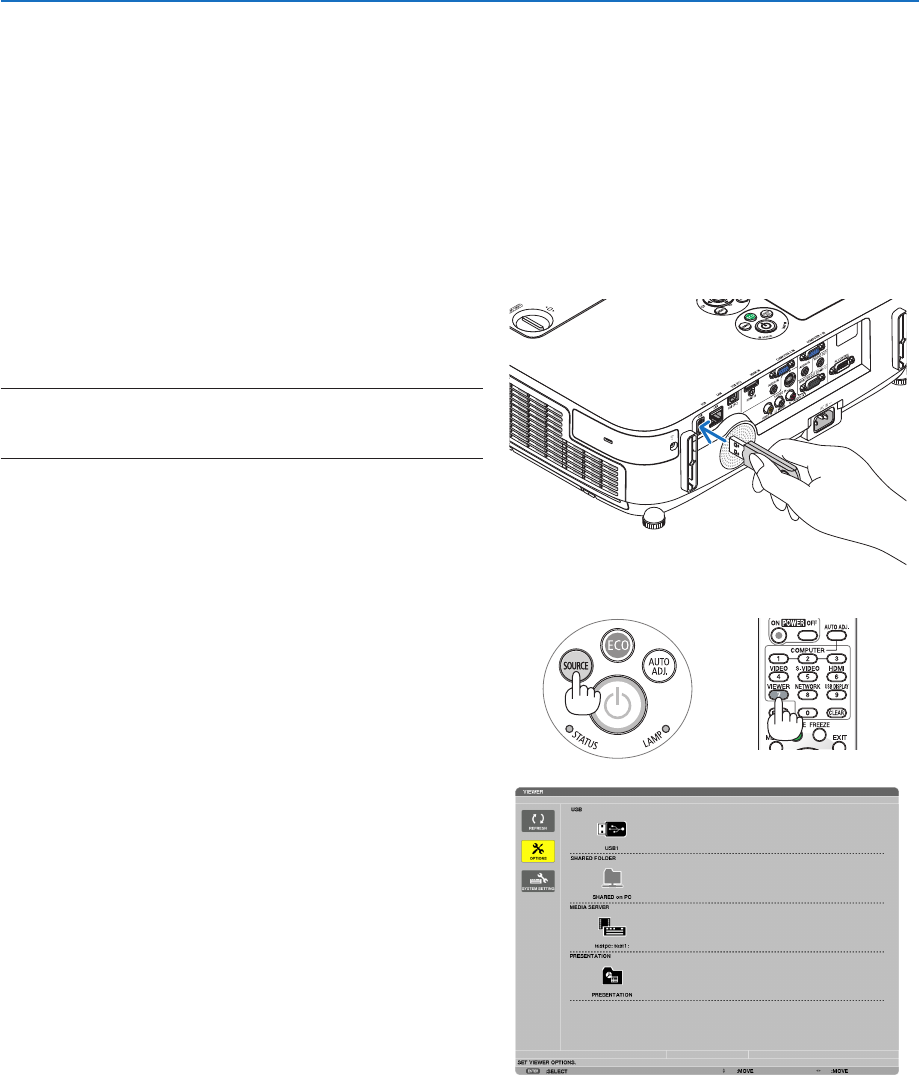
2. InserttheUSBmemoryintotheUSBportoftheprojec-
tor.
NOTE:
• DonotremovetheUSBmemoryfromtheprojectorwhileit’sLED
ashes.Doingsomaycorruptthedata.
TIP:
YoucanaUSBmemoryinserttheprojectorwhenthedrivelistscreen
isdisplayed.
3. PresstheSOURCEbuttontoselect[VIEWER].
A press of the SOURCE button will display the source select
screen.
A few more presses of the SOURCE button will display the
drive list screen.
Another way to select [VIEWER] is to press the VIEWER
button on the remote control.
TIP:
• Formoreinformationaboutthedrivelistscreen,seepage60.
• Todisplaygraphicsinasharedfolder,seepage68;todisplaystill
imagesormovielesinamediaserver,seepage72.


