Getting Started
8
NETGEAR ReadyDATA 5200
You can shut down your unit in these ways:
• Using the Power button:
• Preferred shutdown. Press the Power button two times to initiate a graceful
shutdown.
• Forced shutdown. If the unit is hung, press the Power button and hold for 5 seconds
to force a shutdown.
• Using Dashboard. For information about using Dashboard to shut down your unit, see
the ReadyDATA OS Software Manual.
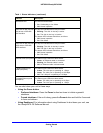
Information LED The LED has these states:
• On. Overheating or fan failure
• Off. Normal operation
Disk LEDs on disk tray with
SAS drives or SSD with
SAS interface
The top LED indicates disk activity as follows:
• Blinking. The disk in the bay is active.
• On. The disk in the bay is inactive.
The bottom LED indicates disk failure, as follows:
• Off. Normal operation
• On. Disk failure
Disk LEDs on disk tray with
SATA drive or SSD with
SATA interface
The top LED indicates disk activity as follows:
• Blinking. The disk in the bay is active.
• Off. The disk in the bay is inactive.
The bottom LED indicates disk failure, as follows:
• Off. Normal operation
• On. Disk failure
Ethernet LEDs (front panel) The Ethernet port LEDs have these states:
• Green. An Ethernet cable is connected.
• Blinking. An Ethernet cable is active.
• Off. An Ethernet cable is disconnected.
1-gigabit Ethernet port
LEDs (rear panel)
The Ethernet port LEDs have these states:
• Amber. The LAN port is operating at 1 Gbps.
• Green. The LAN port is operating at 100 Mbps.
• Off. The LAN port is operating at 10 Mbps.
10-gigabit Ethernet ports
(rear panel)
The Ethernet port LEDs have these states:
• Green. The LAN port is operating at 10 Gbps.
• Amber. The LAN port is operating at 1 Gbps.
Table 1. Status indicators (continued)
Indicator Description


