Model FS516/FS524 Fast Ethernet Switch Installation Guide
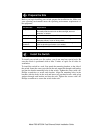
Before you begin installing your switch, prepare the installation site. Make sure
your operating environment meets the operating environment requirements of
the equipment.
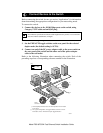
To install your switch on a flat surface, you do not need any special tools. Be
sure the switch is positioned with at least 2 inches of space on all sides for
ventilation.
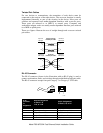
To install the switch in a rack, first attach the mounting brackets to the side of
the switch. Insert the screws provided in the rack mount kit through each bracket
and into the bracket mounting holes in the switch. Tighten the screws with a #1
Phillips screwdriver to secure each bracket. Align the mounting holes in the
brackets with the holes in the rack and insert two pan-head screws with nylon
washers through each bracket and into the rack. Tighten the screws with a #2
Phillips screwdriver to secure the switch in the rack.
Characteristic Requirement
Temperature Ambient temperature between 0
°
and 40
°
C (32
°
and 104
°
F).
No nearby heat sources such as direct sunlight, warm air
exhausts, or heaters.
Operating humidity Maximum relative humidity of 90%, noncondensing.
Ventilation Minimum 2 inches (5.08 cm) on all sides for cooling.
Adequate airflow in room or wiring closet.
Operating
conditions
At least 6 feet (1.83 m) to nearest source of electromagnetic noise
(such as photocopy machine or arc welder).
Power Adequate power source within 6 feet (1.83 m).
Prepare the Site
Install the Switch


