


4-3installation
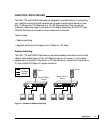
Installing the Switch
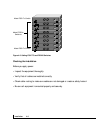
You can install the NETGEAR FS517TS and FS524S Switches on a flat surface or in
a standard 19-inch rack.
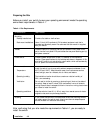
Installing the Switch on a Flat Surface
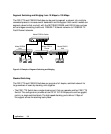
1.The switch ships with four self-adhesive rubber footpads. Stick one rubber foot pad
on each of the four concave spaces on the bottom of the switch.The rubber foot pads
cushion the switch against shock/vibrations.They also provide space between each
stacked switch for ventilation.
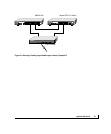
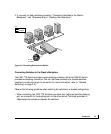
2.To stack switches:
• Repeat step 1 for each switch to be stacked.
• Place the first switch on a firm flat surface where you want to install the stack.
Stack the other switches on top of this unit.
• Proceed to “Connecting Switches to the Stack’s Backplane” on page 21.
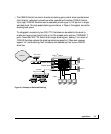
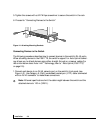
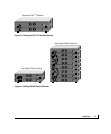
Installing the Switch in a Rack
To install the FS517TS or FS524S Switch in a rack, use the following procedure (and
refer to Figure 4-1).To perform this procedure, you need the 19-inch rack-mount kit
supplied with your switch.
1.Attach the supplied mounting brackets to the side of the switch.
2.Insert the screws provided in the rack-mount kit through each bracket and into the
bracket mounting holes in the switch.
3.Tighten the screws with a #1 Phillips screwdriver to secure each bracket.
4. Align the mounting holes in the brackets with the holes in the rack, and insert two
pan-head screws with nylon washers through each bracket and into the rack.