


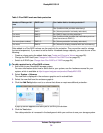

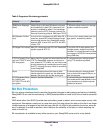
Table 5. Flex-RAID levels and data protection
Can I add a disk to for data protection?RAID LevelNumber of Disks per Vol-
ume
Yes. (Additional disk provides redundancy.)RAID 11
No. (Volume protection is already redundant.)RAID 12
No. (RAID 0 does not offer protection.)RAID 02 or more
Yes. (Additional disk provides dual redundancy and con-
verts the volume to RAID 6.)
RAID 53 or more
No. (Volume protection is already redundant.)RAID 104 or more (even number)
No. (Volume is already protected with dual redundancy.)RAID 64 or more
Disks added to a Flex-RAID volume can be used only for protection. They cannot be used for storage
(horizontal expansion). If you want to add a disk for increased storage capacity, you must do one of the
following:
• Create a volume using the added disks (see Create and Encrypt a Volume on page 28).
• Change the RAID level (see Change to a Different Flex-RAID Level on page 25).
• Switch to X-RAID (see Change from Flex-RAID to X-RAID on page 24).
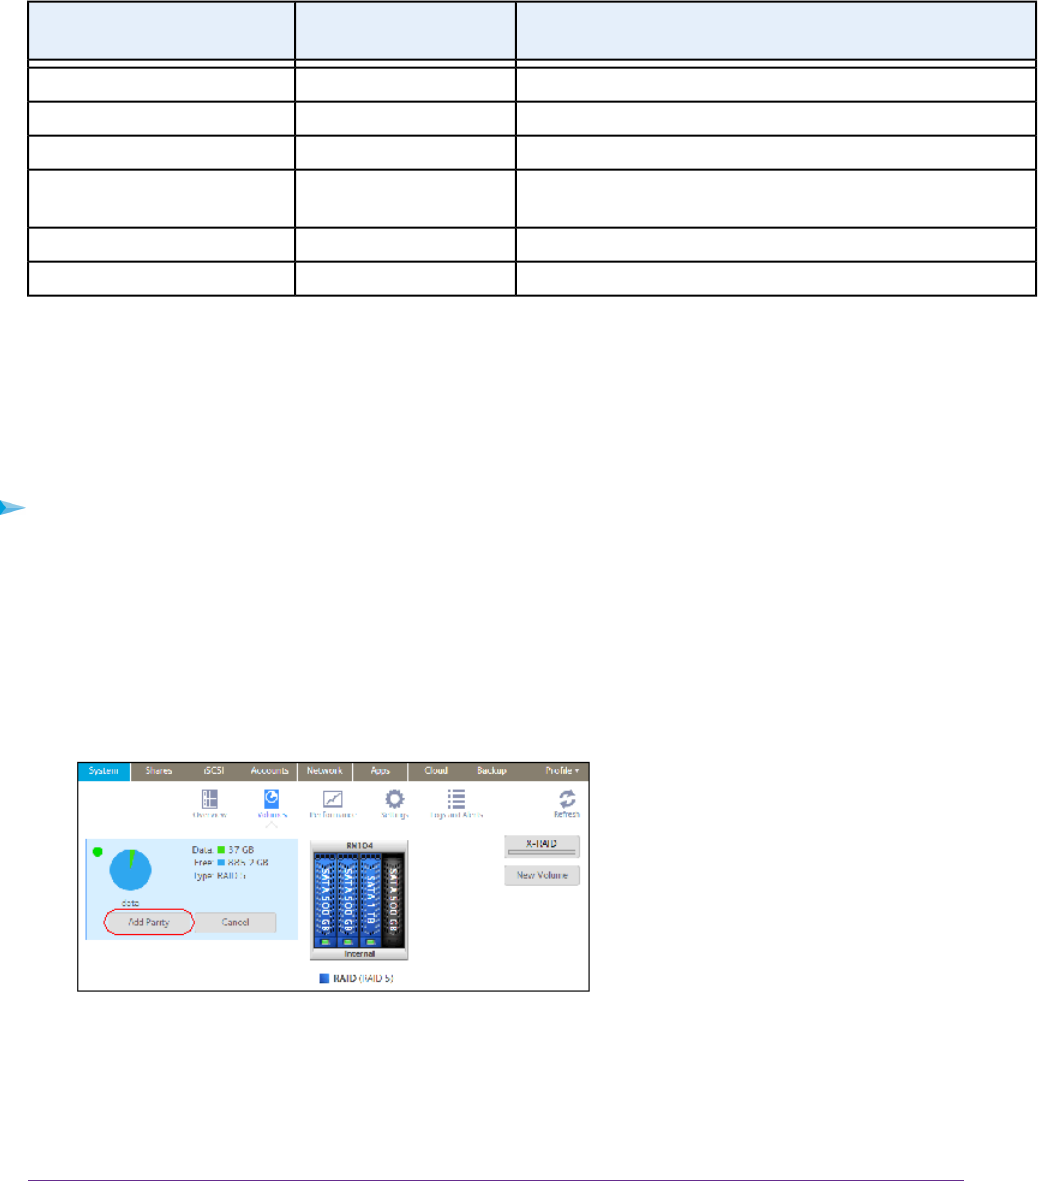
To add a protection to a Flex-RAID volume:
1. Add a disk to your ReadyNAS storage system.
For more information about how to add a disk to your system, see the hardware manual for your
system, which is available at http://support.netgear.com/product/ReadyNAS-OS6.
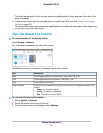
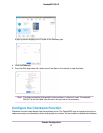
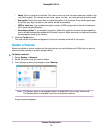
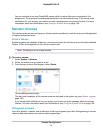
2. Select System > Volumes.
The new disk is displayed in the enclosure graphic and is colored black.
3. Select the new disk from the enclosure graphic.
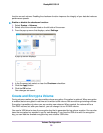
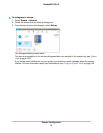
4. Click the Add Parity button next to a volume that allows or requires additional protection.
A pop-up screen appears and asks you to confirm your decision.
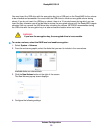
5. Click the Yes button.
Your data protection is increased in the background while you continue to use your storage system.
Volume Configuration
34
ReadyNAS OS 6.2