


All you need to do is e-mail the fpd file to Schaeffer in Germany, or Frontpanel Express in the
US, and they do the rest. You can also use the Frontplatten Designer program's own online
ordering procedure which also works very well.
The panel is black with white engraved legending. The panel itself is made from 3mm thick
black anodised aluminium. The fpd panel can be edited, including changing the colour, with
the Frontplatten Designer. The program available on the Schaeffer web site but it should be
noted that the program is for Windows only.
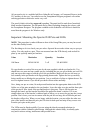
Important: Mounting the Spectrol 248 Pots and LEDs
NOTE: This procedure is rather different to that of the Omeg/Piher pots you may have used
on the older Oakley boards.
The first thing to do is to check your pot values. Spectrol do not make it that easy to spot pot
values. You only need two pots. These are mounted onto the PCB directly, and are held in
place by our specially made pot brackets.
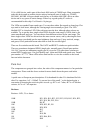
Value Marked as Quantity Location
10K linear M248 10K M 2 off UP & DOWN
Fit a pot bracket to each of the two pots by the nuts supplied with the pot bracket kit. You
should have two nuts and one washer per pot, including the one you got with the pot itself. Fit
only one nut at this stage to hold the pot to the pot bracket. Make sure the pot sits more or
less centrally in the pot bracket with legs pointing downwards. Tighten the nut up carefully
being careful not to dislodge the pot position. I use a small pair of pliers to tighten the nut. Do
not over tighten because if you do the pot shaft will not rotate smoothly.
Now, doing one pot at a time, fit each pot and bracket into the appropriate holes in the PCB.
Solder two of the pins attached to the pot bracket. Leave the other two pins and the three pins
of the pot itself. Now check if the pot and bracket is lying true. That is, all four pins are
through the board, and the bracket should be flat against the board’s surface. If it is not,
simply reheat one of the bracket’s soldered pads to allow you to move the pot into the correct
position. Don’t leave your iron in contact with the pad for too long, this will lift the pad and
the bracket will get hot. When you are happy with the location, you can solder the other two
pins of the bracket and then the pot's pins. Do this for both pots and snip off any excess wire
from the pot's pins at this point.
The LEDs must be fitted carefully if you are using the directly mounted technique in
conjunction with the Schaeffer panel design. Although this sounds fiddly, its actually quite
easy and it reduces wiring, interference and possible errors.
13