


E-18
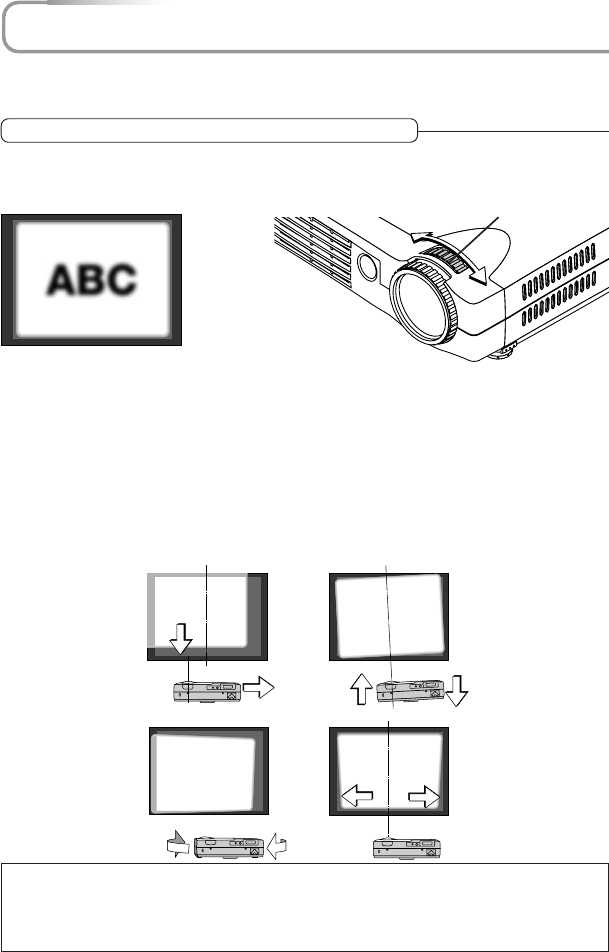
Adjustment of the Projection Screen
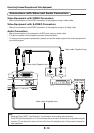
Switch on the power of the connected equipment and make the adjustments with the video
signal being input to the projector.
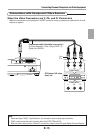
Projection Screen Position Adjustment
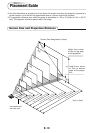
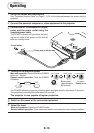
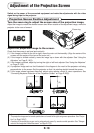
Adjust the projection image to the screen.
Check that the screen is set level and vertically.
(1) If the image is shifted to the left or right, move the main unit horizontally. (Align the center of the
screen and the center of the lens of the main unit.)
(2) If the image is shifted vertically, move the image up or down with the adjuster. See “Using the
Adjusters” on Page E-19(S).
(3) If the image is slanted, adjust by turning the right or left front adjuster. See “Using the Adjusters”
on Page E-19(S).
(4) A projection image such as that illustrated in the diagram is the result of the projector not being
perpendicular to the screen. Set the projector so that it is pointing straight toward the screen.
(5) If the image shows keystone distortion, adjust using remote control or menu operations. See
“Correcting Keystone Distortion of the Projection Screen” on Page E-26(S).
(1)
(2)
(3)
(4) (5)
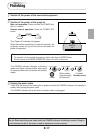
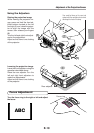
Turn the zoom ring to adjust the screen size of the projection image.
Adjust the image to match the desired screen size. When outside of the adjustment range, move the
projector to the rear or forward.
Zoom ring
Note
* The projection image can be turned upside down or turned left to right using menu operations. See “Projec-
tion” on Page E-52(C).
* A portion of the projection screen can be enlarged and moved by remote control operation. See “Enlarge-
ment of the Image and Video Movement” on Page E-27(S).