


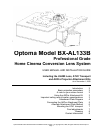
Optoma BX-AL133B User Manual and Installation Guide, Version 1.0, copyright Nov, 2008, all rights reserved, Panamorph Inc.
Page 7
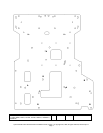
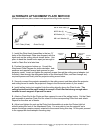
MOUNTING THE ATH1 TRANSPORT
1. DO NOT CONNECT POWER TO THE TRANSPORT AT THIS TIME.
2. Position the flat side of the
motorized transport against the bottom
side of the Attachment Plate so that the
transport logo is toward the screen and
the center “M” hole in the Attachment
Plate is aligned with the front recessed
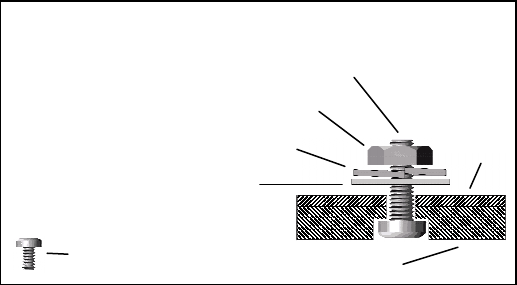
transport hole. Insert the #10-32 pivot
screw up through the transport and
Attachment Plate and loosely complete
the assembly with the corresponding
washer, lock washer and nut. Now
loosely insert the four small 3/8” screws
through the four remaining “M” slots through the top of the Attachment Plate and down into the
transport.
3. Refer to the ATH1 user manual (included with ATH1) for additional instructions to install
the lens at this time, but do not forget to complete the “Final Adjustments” step below.
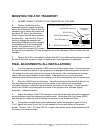
FINAL ADJUSTMENTS (ALL INSTALLATIONS)
1. Turn the projector on with the UH480 Lens out of the projector beam. Set the horizontal
lens shift to neutral (if a feature of your projector) and then adjust the ceiling mount so that the
16:9 image is in the exact center of and square to the screen, with a similar amount of image
slightly over the top and bottom screen borders. If the projector lens is not in the exact
horizontal center of the screen you may need to use a little horizontal lens shift for this purpose.
2. Bring the UH480 Lens into the beam. Adjust the vertical position and tilt of the Lens so
that the projector beam is passing through the center of the Lens and so any residual
pincushion distortion is about the same at the top and bottom of the image. This will typically
result in the UH480 Lens being below the center of the projector lens and tilted slightly
downward. Tighten the knobs.
3. Adjust the rotation of the ATH1 transport so that the left and right sides of the image are
an equal distance from their respective screen borders. Now tighten the Pivot Screw (M380)
and also the four remaining screws holding the transport to the Attachment Plate.
4. For optimum multiple aspect ratio performance, adjust the projector’s zoom so that a
1.85:1 aspect ratio movie (Lens “out”) is just masked by the top and bottom of the screen
border. This way 1.85:1, 16:9 and 2.35-2.4:1 aspect ratio movies should all be presented to fill
the screen at a constant height.
ATH1/M380 Attachment Bag Contents
#6-32x3/8” screw (4)
#10-32x5/8” screw (1)
#10-32 lock washer (1)
#10-32 washer (1)
#10-32 nut (1)
Pivot screw as
assembled
Attachment
Plate
ATH1
mount