


29
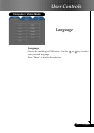
... English
4. Follow the above steps 1-2. Click on the “Advanced Properties”
button.
5. Select the “Change” button under the “Monitor” tab .
6. Click on “Show all devices”. Then select “Standard monitor
types” under the “Manufacturers” box ; choose the resolution
mode you need under the “Models” box.
7. Verify that the resolution setting of the monitor display is less
than or equal to 1024 x 768.
4
If you are using a Notebook PC:
1. You are required to implement the above steps of resolution
setting of the computer first.
2. Switch the Notebook PC display to the “external display only”
or “CRT only” mode.
4
If you experience difficulty in changing resolutions or your
monitor freezes, restart all the equipment and the projector.
Problem: The screen of the Notebook or PowerBook computer
is not displaying your presentation.
4
If you are using a Notebook PC:
Some Notebook PCs may deactivate their screens when a second
display device is in use. Refer to your computer’s documentation
for information on how to reactivate the monitor display.
4
If you are using an Apple PowerBook:
In Control Panels, open the PowerBook Display to select Video
Mirroring “On”.
Problem: Image is unstable or flickering
4
Use “Phase” to correct it. Refer to page 20.
4
Change the monitor color setting from your computer.
Problem: Image has vertical flickering bar
4
Use “Frequency” to make an adjustment. Refer to page 20.
4
Check and reconfigure the display mode of your graphic card to
make it compatible with the product. Refer to page 28.
Problem: Image is out of focus
4
Adjusts the Focus Ring on the projector lens. Refer to page 14.
4
Make sure the projection screen is between the required distance
3.9 to 32.8 feet (1.2 to 10.0 meters) from the projector.
Appendices