


EN
8
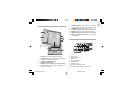
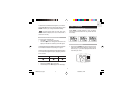
• Slide the PROJECTION switch ON to activate
continuous projection. However, this function will not
work unless the AC / DC adaptor is used.
• Adjust the FOCUS knob to make the image clearer.
• Manually tilt the projection unit to position the image.
NOTE You can also press the SNOOZE / LIGHT button
to project the time and alarm status for 5 seconds.
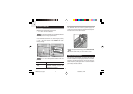
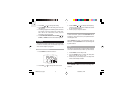
RESET THE CLOCK
Insert a thin blunt instrument into the hole below RESET
to return to the default settings.
The default settings are:
EU Clock Time: 12.00
UK Clock Time: 12:00 pm
Date: 1st January 2005
Language: English
Time Offset: +0
Alarm Time: 6.00 AM
Daily Alarm(s): Disabled
EU Display Setting: 24hr, DD / MM
UK Display Setting: 12hr, DD / MM
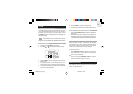
WARNINGS
This product is designed to give you years of service if
handled properly. Oregon Scientific will not be responsible
for any deviations in the usage of the device from those
specified in the user instructions or any unapproved
alterations or repairs of the product. Observe the following
guidelines:
• Do not clean any part of the product with benzene,
thinner or other solvent chemicals – this may cause
permanent damage that is not covered by the guarantee.
When necessary, clean it with a damp cloth.
• Never immerse the product in water. This can cause
electrical shock and damage the product.
• Do not subject the product to extreme force, shock,
or fluctuations in temperature or humidity.
• Do not tamper with the internal components.
• Do not mix new and old batteries or batteries of
different types.
• Do not use rechargeable batteries with this product.
• Remove the batteries if storing this product for a long
period of time.
• Do not scratch the LCD display.
NOTE The technical specification of this product and
contents of this user manual are subject to change
without notice. Images not drawn to scale.
RRM326P_EN_output 03/09/2005, 14:448