


3. Telephone
25
To delete a number
Press {<} or {>} to move the cursor to the
number you want to delete and press {STOP}.
To insert a number
1. Press {<} or {>} to move the cursor to the
position to the right of where you want to
insert the number.
2. Enter the number.
3.5.2 Erasing all caller
information
1 Press {MENU} repeatedly to display
“CALLER SETUP”.
2 Press {SET}.
3 Press {SET}.
L To cancel erasing, press {STOP} 3 times.
4 Press {SET}.
5 Press {STOP}.
3.5.3 Erasing specific caller
information
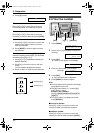
1 Press {CALLER ID}.
2 Press {A} or {B} repeatedly to display the
desired item.
3 Press {<}.
L To cancel erasing, press {STOP} 2 times.
4 Press {SET}.
L To erase other items, repeat step 2 to 4.
5 Press {STOP}.
Another method to erase a specific caller
information (KX-FP145 only)
1. Press {CALLER ID}.
2. Press {A} or {B} repeatedly to display the
desired item.
3. Press {ERASE}.
L To erase other items repeat step 2 to 3.
4. Press {STOP}.
Note:
L Telstra, Optus, Telecom New Zealand and
TelstraClear do not currently send caller
name information.
3.6 Storing caller
information into the
navigator directory
L Keep the front cover page open for button
locations.
Important:
L This feature is not available in the
following cases.
– The telephone number includes data
other than numbers (i.e., * or #).
– The caller information does not
include a telephone number.
1 Press {CALLER ID}.
2 Press {A} or {B} repeatedly to display the
desired item.
3 Press {MENU}.
4 Press {SET}.
5 Press {SET}.
Note:
L You can confirm the stored items in the
telephone number list (page 67).
L The unit can only store a name of up to 10
characters long.
L To edit a name and number, see page 21.
L Telstra, Optus, Telecom New Zealand and
TelstraClear do not currently send caller
name information.
FP141-145AL.book Page 25 Tuesday, October 21, 2003 11:07 AM