


B
A
ENGLISH-55
Care and maintenance
54-ENGLISH
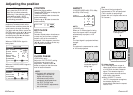
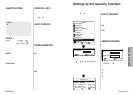
+Press the ENTER button to
display the “OPTION2” menu,
and then press the F or G
button to select “LAMP
RUNTIME”.
,Press and hold the ENTER
button for approximately 3
seconds.
The “LAMP RUNTIME” will
change to “TIME RESET
[POWER OFF]”.
-Turn off the power.
This will reset the cumulative usage
time for the lamp unit to
“0”
.
Refer to page 26 for details on
how to turn off the power.
'Install the lamp unit cover, and
then use a Phillips screwdriver
to securely tighten the lamp
unit cover fixing screws.
(Connect the power cord.
)Press the POWER button so
that a picture is projected onto
the screen.
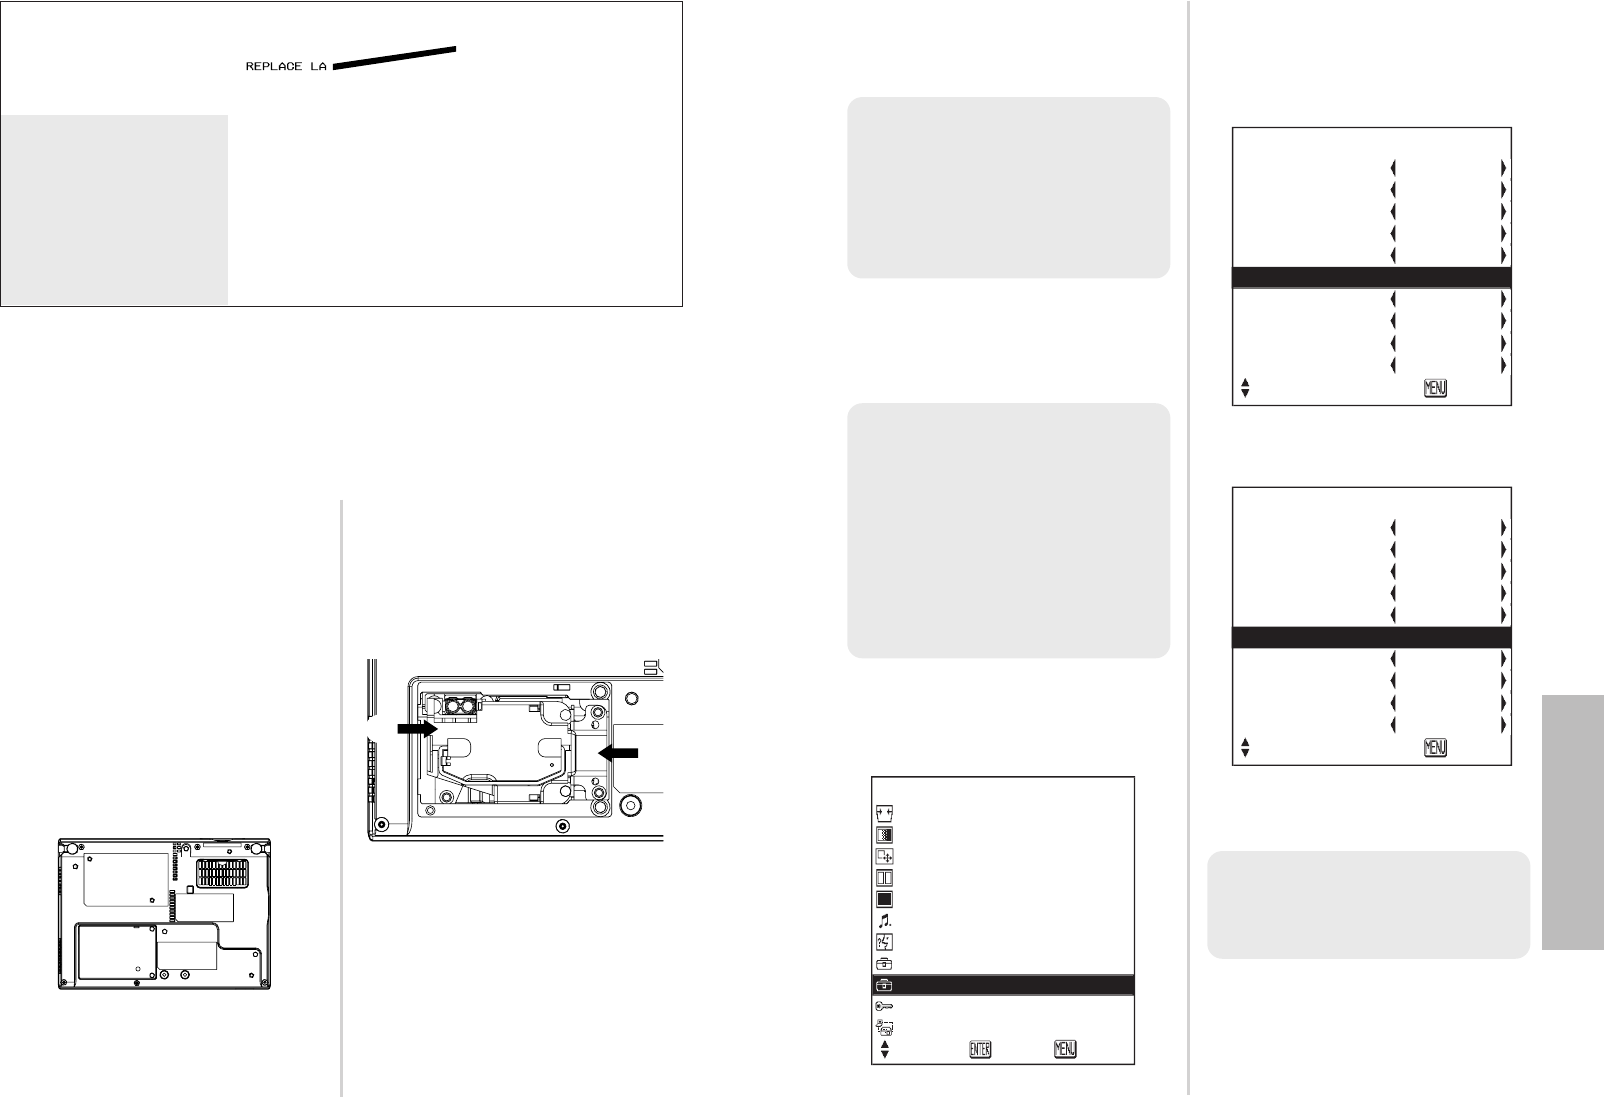
*Press the MENU button to
display the “MAIN MENU”, and
then press the F or G button
to select “OPTION2”.
MENU
KEYSTONE
PICTURE
POSITION
INDEX WINDOW
SHUTTER
VOLUME
LANGUAGE
OPTION1
OPTION2
SECURITY
NETWORK
SELECT
ENTER EXIT
OPTION2
BACK COLOR BLUE
FRONT/REAR FRONT
DESK/CEILING DESK
FAN CONTROL STANDARD
LAMP POWER HIGH
LAMP RUNTIME 1820H
FUNC 1 INDEX
CONTROL KEY ON
AUTO POW.OFF DISABLE
POWER MEMORY ON
SELECT RETRN
OPTION2
BACK COLOR BLUE
FRONT/REAR FRONT
DESK/CEILING DESK
FAN CONTROL STANDARD
LAMP POWER HIGH
TIME RESET [POWER OFF]
FUNC 1 INDEX
CONTROL KEY ON
AUTO POW.OFF DISABLE
POWER MEMORY ON
SELECT RETRN
NOTE:
B
Be sure to install the lamp unit
and the lamp unit cover securely.
If they are not securely installed,
it may cause the protection
circuit to operate so that the
power cannot be turned on.
NOTE:
BIf the MENU button is pressed,
the lamp time resetting screen
will be cancelled.
NOTE:
BIf the power cord was
disconnected during projection
when the projector was used
the last time, projection will start
after the power cord is
connected (when “POWER
MEMORY” in the “OPTION2”
menu is set to “ON”). Refer to
page 46 for details.
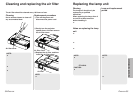
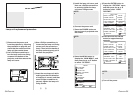
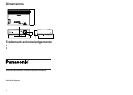
Lamp unit replacement procedure
#Disconnect the power cord
from the projector by following
the procedure on page 26, and
check that the area around the
lamp unit has cooled down.
$Use a Phillips screwdriver to
turn the lamp unit cover fixing
screws at the bottom of the
projector, and then remove the
lamp unit cover.
%Use a Phillips screwdriver to
loosen the two lamp unit fixing
screws until the screws turn
freely. Then hold the handle of
the lamp unit and gently pull it
out from the projector.
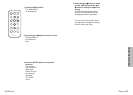
&Insert the new lamp unit while
making sure that the direction
of insertion is correct, and then
use a Phillips screwdriver to
securely tighten the lamp unit
fixing screws.
When inserting the new lamp
unit, be sure to push it in at the
point A and B.
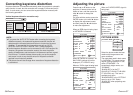
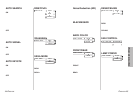
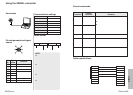
LAMP indicatorOn-screen display
Illuminates red during
image projection and
standby mode.
Displayed for 30
seconds. Pressing any
button will clear the
display.
More than 1 800 hours
Remains displayed until
any button is pressed.
More than 2 000 hours