


Charging the Wireless Monitor
C
harge the Wireless Monitor for at least 30 minutes before pairing it to the Base Unit for the first time
*1
(page 10). After pairing, replace the Wireless Monitor and complete charging.
*1 This time is a guide for the time required when the temperature is 20 °C. When the surrounding
temperature is low, the time required for charging may increase.
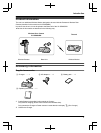
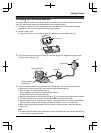
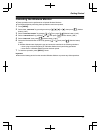
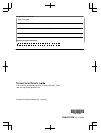
1 Insert the battery pack.
R Open the cover (A), insert the battery pack (B), and then close the battery cover (A).
Battery cover
A
B
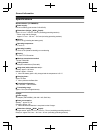
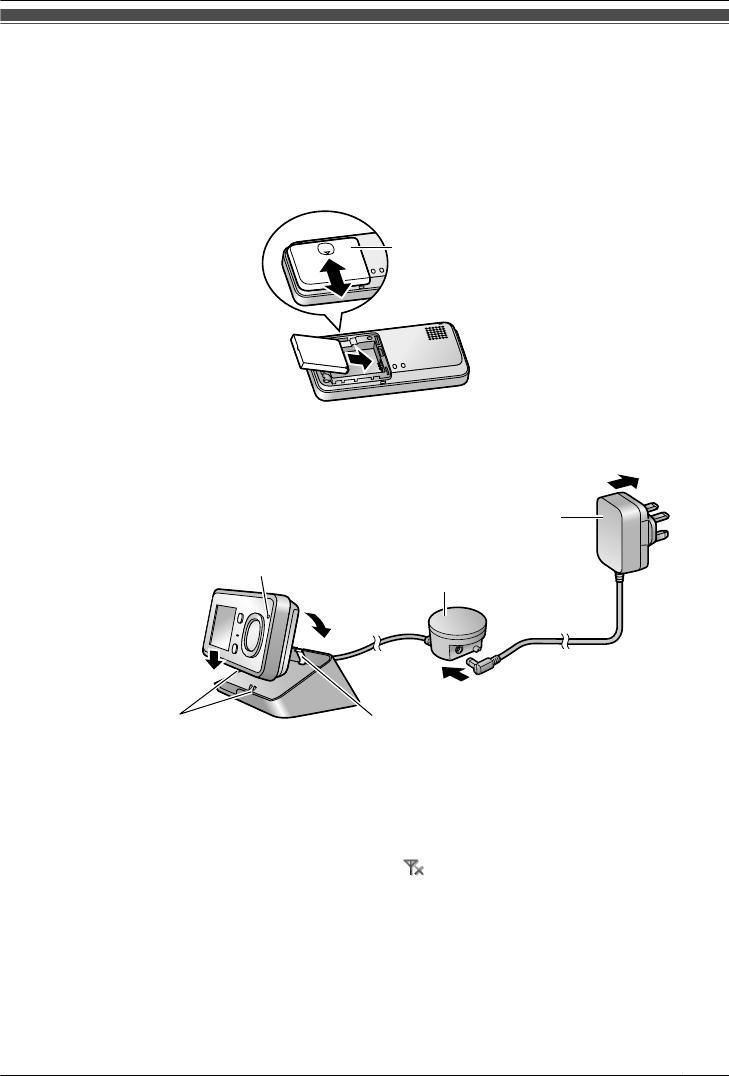
2 P
lug the connector into the relay box firmly (C), and then plug the AC adaptor into a power outlet
(100-240 V AC, 50/60 Hz) (D).
Pin
Charge contacts
(metal parts)
Charge indicator
AC adaptor
F
E
D
Relay box
C
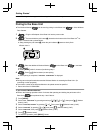
3 P
lace the Wireless Monitor on the lower part of the Charger (E), and then firmly push it into the
Charger until it clicks into place (F). Check that the charge indicator lights up.
R While charging: the charge indicator lights up.
When charging is completed: the charge indicator turns off.
(It takes about 6 hours to complete charging.)
R When the signal display for the Wireless Monitor is
(out of range), the charging time increases.
R T
he Wireless Monitor can be left on the Charger without causing it to overcharge.
R When the battery pack is completely out of power, it may take some time until the charge indicator
lights up (about 5 minutes) when charging the Wireless Monitor. This is not a malfunction.
R When removing the Wireless Monitor from the Charger, remove the upper part of the Wireless
Monitor first.
Note:
R In order to maintain battery pack performance, remove the battery pack when the Wireless Monitor
is not in use for long periods of time.
9
Getting Started