


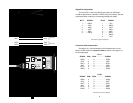
AT&T standard modular pin assignments
4.2 WIRING FOR MULTI-POINT CIRCUITS
The Model 1012B supports multi-point applications using either a
star or a daisy chain topology. Both topologies require special wiring.
Note: Refer to Section 3.2 for multi-point settings.
4.2.1 STAR TOPOLOGY
Using a star topology, you may connect several Model 1012Bs
together in a master/slave arrangement. Maximum distance between
the units will vary based upon the number of drops, data rate, wire
gauge, etc. Contact Patton Technical Support (301) 975-1007;
http://www.patton.com; or, support@patton.com for specific
distance estimates.
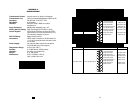
Table 3 shows how to wire the two-pair cables properly for a Model
1012B star topology. Note that the ground connection is not needed.
9
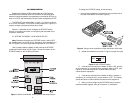
4.2.2 DAISY CHAIN TOPOLOGY
Using a daisy chain topology, you may connect several Model
1012Bs together in a master/slave arrangement. Maximum distance
between the units will vary based upon the number of drops, data rate,
wire gauge, etc. Contact Patton Technical Support at (301) 975-1007;
http://www.patton.com; or, support@patton.com for specific
distance estimates.
Figure 6 shows how to wire the two-pair cables properly for a
Model 1012B’s daisy chain topology. Note that the ground connection is
not needed.
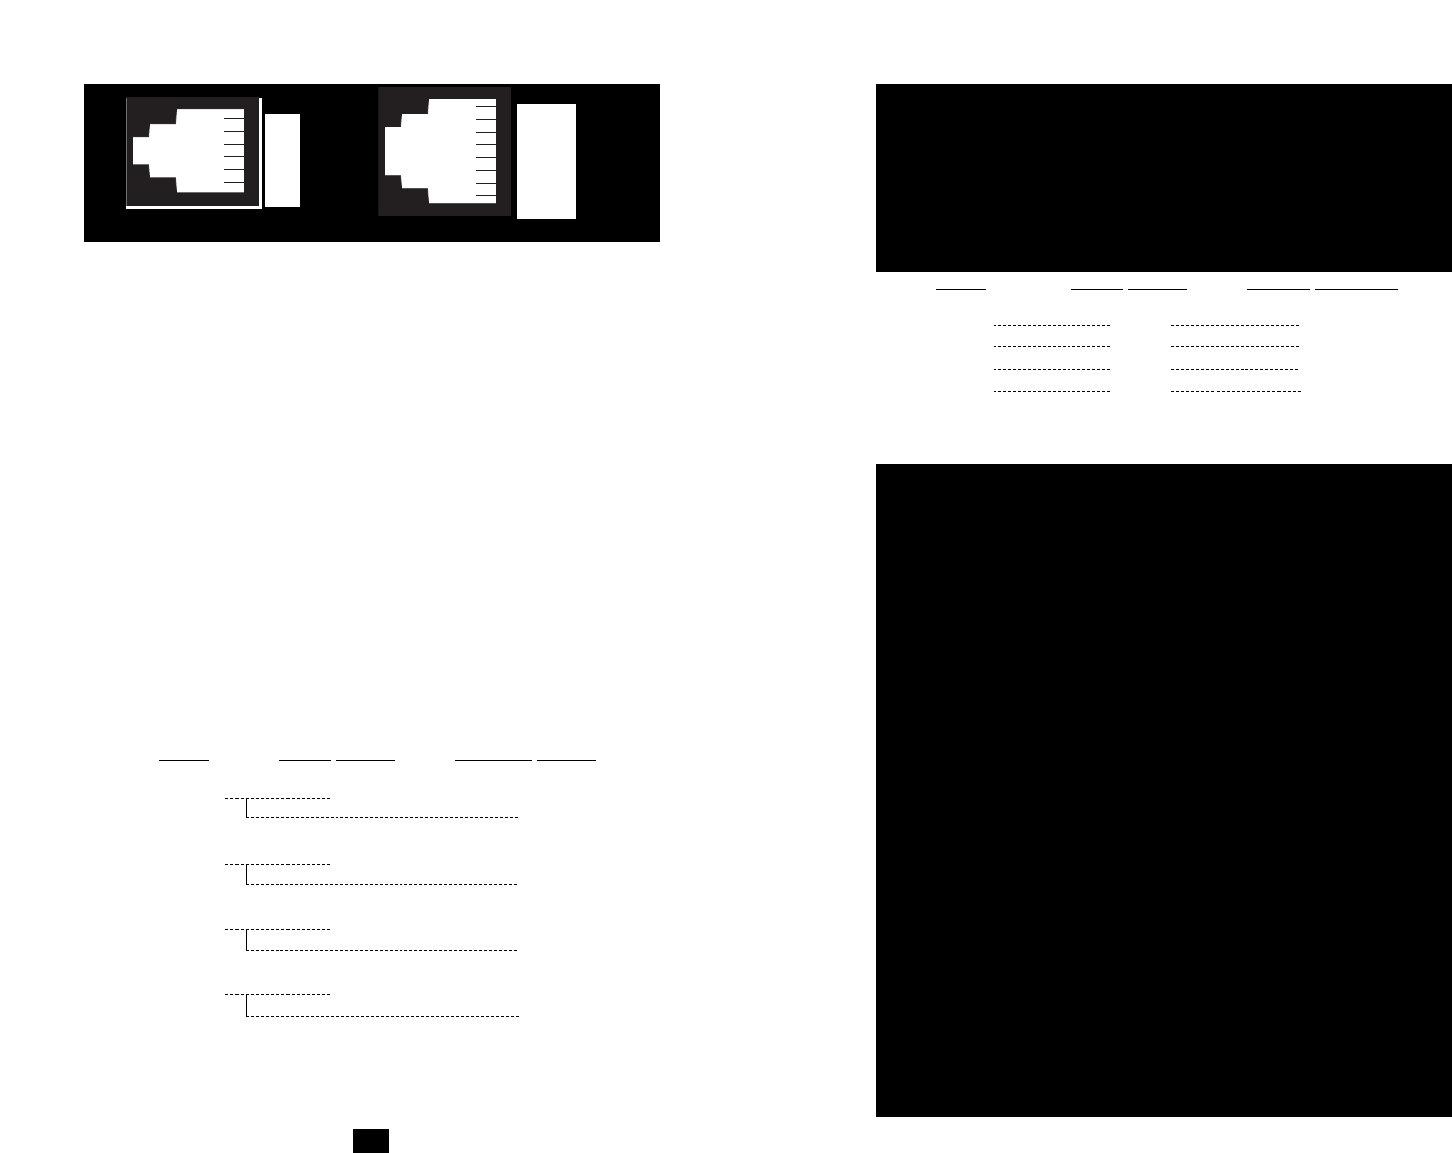
Optional Connection: Dual Modular Jacks
To facilitate daisy chaining, the Model 1012B is available in a
"DRJ11" (dual RJ-11) or "DRJ45" (dual RJ-45) version. These units have
two specially wired modular jacks for twisted pair connection. With the
dual modular units, you do not need to build cumbersome "Y" cables for
your daisy chain application. Simply use a crossover cable to go between
the host and the first slave (see Section 4.1.2 for crossover cable wiring
instructions), and straight through cables between the slaves.
4.3 CONNECTION TO THE RS-232 INTERFACE
Once you have properly configured the Model 1012B and
connected the twisted pair wires correctly, plug the Model 1012B
directly into the DB-25 port of the RS-232 device. After doing so,
remember to insert and tighten the two captive connector screws.
Note: If you must use a cable to connect the Model 1012B to the
RS-232 device, make sure it is a straight through cable of
the shortest possible length—we recommend 6 feet (1.8
meters) or less.
4.4 OPERATING THE MODEL 1012B
Once the Model 1012B is properly installed, it should operate
transparently—as if it were a standard cable connection. Operating power
is derived from the RS-232 data and control signals; there is no "ON/OFF"
switch. All data signals from the RS-232 interface are passed straight
through. Additionally, one control signal is passed in each direction.
10
1
2
3
4
5
6
7
8
1
2
3
4
5
6
HOST FIRST SLAVE SECOND SLAVE
XMT+ RCV+
RCV+
XMT- RCV-
RCV-
RCV+ XMT+
XMT+
RCV- XMT-
XMT-
Table 3. Star wiring for Model 1012B host and slaves
HOST FIRST SLAVE OTHER SLAVE(S)
XMT+ RCV+ RCV+
XMT- RCV- RCV-
RCV+ XMT+ XMT+
RCV- XMT- XMT-
Table 3. Daisy Chain Wiring for Model 1012B Host and Slaves