


10 RF link Operating Instructions RF link Operating Instructions 7
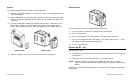
Renegade 4 Printers with External Modules
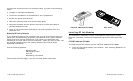
To link a Renegade 4 printer (with an external RF link module) to a data
collection terminal:
1. Turn the printer, terminal, and the RF link modules off.
2. Turn on the printer.
3. Wait for the printer's LED (near the trigger) to blink once.
4. Turn on the printer's RF link module. The green LED turns on.
5. Turn on the terminal's RF link module. The green LED turns on. Then,
the LEDs on both modules start blinking.
6. Turn on the terminal.
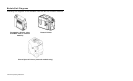
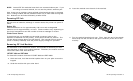
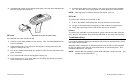
Inserting Batteries
To insert a battery into the external RF link module:
1. Carefully slide the battery door (located on the bottom of the terminal
module and the non-VELCRO side of the printer module) to the right.
You will hear a click.
2. Open the door to the left. It does not detach from the module.
3. Keeping the door pulled out, insert the battery in the compartment.
Orient the battery so the top faces right, and the + contact (the smaller
one) faces up.
4. Close the door.
Linking RF link Units
Link procedures vary, depending on the printer you are using and whether
the module is internal or external.
Before linking any units, set the communication parameters on the data
collection terminal to:
♦ DTR flow control
♦ 8 data bits
♦ No parity
♦ 9600 baud
♦ 1 stop bit.
See the data collection terminal’s documentation to learn how to set these
parameters.