Initial Operation · Connecting handset 9
EN
Connecting handset
Type 3 (mit Telefon)
(IPF¦525, IPF¦555)
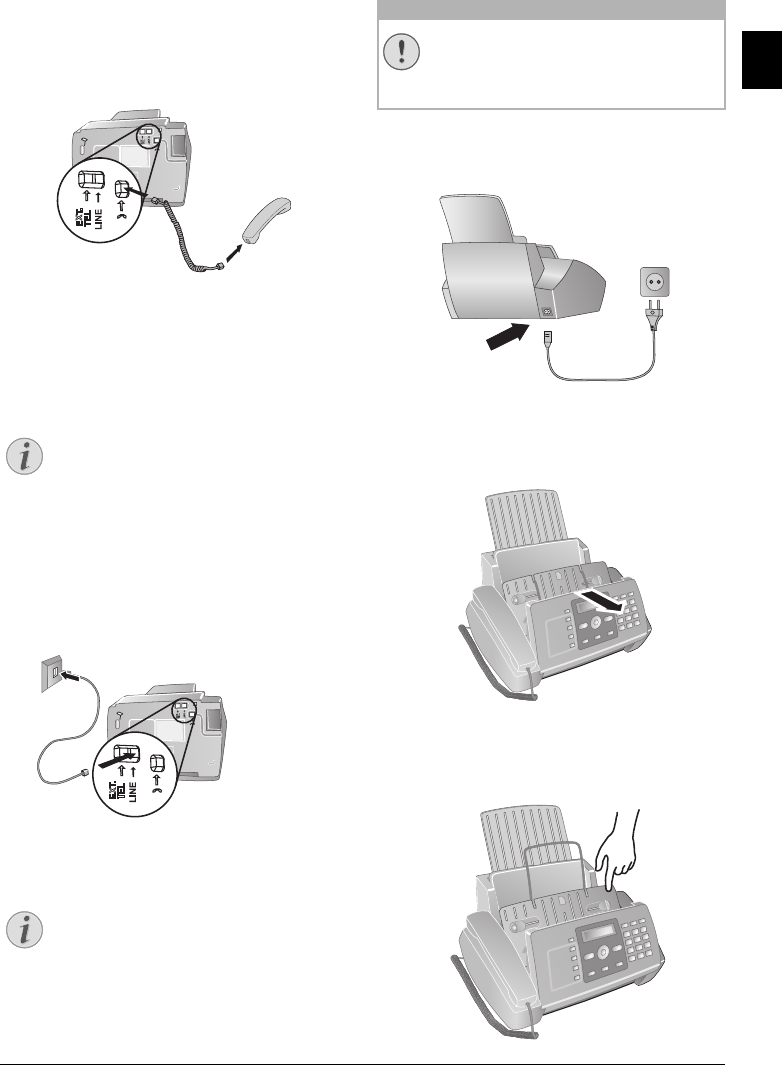
Plug one end of the spiral cable into the socket on the tel-
ephone handset. Put the other end into the socket at the
device bottom marked with ) symbol.
Telefonhörer anschließen
Connecting the Telephone
Cable
Connecting the Te lephone Cable
Connecting the Te lephone Cable
Connect the telephone cable to the device by inserting it in
the socket designated with LINE (RJ-11-Connector).
Insert the telephone plug into your PTT line socket.
Telefonkabel anschließen
PABX Systems 1
Connecting the Mains Cable
Mains Voltage a t the Site of Installation
Connecting the Mai ns Cable
Insert the mains cable into the connection located on the
rear side of the device. Plug the power cable into the elec-
trical outlet.
Netzkabel anschließen Faxjet
Inserting Ink Cartridge
1 Open the control panel, by lifting and folding it up in
the centre. Click the control panel completely in place.
2 Open the cartridge compartment by pressing on the
upper right corner of the document holder (arrow) and
then carefully lifting it backwards. Click the document
holder completely in place.
Notice
Analogue Fax Machine
Your device is an analogue fax device (Group 3).
It is not an ISDN device (Group 4), and there-
fore it cannot be operated directly on an ISDN
connection. In order to do this, you need either
an analogue adapter or a connection for ana-
logue terminals.
Notice
Connection to Private Automatic
Branch Exchange
If you connect your device as extension to a tel-
ephone system, you must set it for working as an
extension (also see Chapter
Telephone connec-
tions and additional devices
, page 33).
CAUTION!
Mains Voltage at the Site of Installation!
Check whether the mains voltage of your device
(indicated on the type label) matches the mains
voltage available at the setup location.


