


SPX Operation Manual 5
Version 1.1: 2010 © 2010 Philips Selecon All Rights Reserved
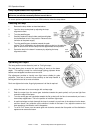
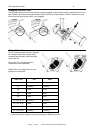
Peak
symbol
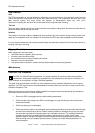
Lamp Replacement and Adjustment
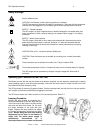
Isolate electrically before re-lamping the luminaire. Also be aware that the lamp and/or luminaire may
still be hot, so exercise necessary caution to avoid burns.
To ensure optimum performance from your SPX luminaire, follow the steps below:
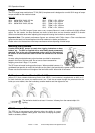
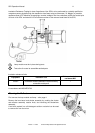
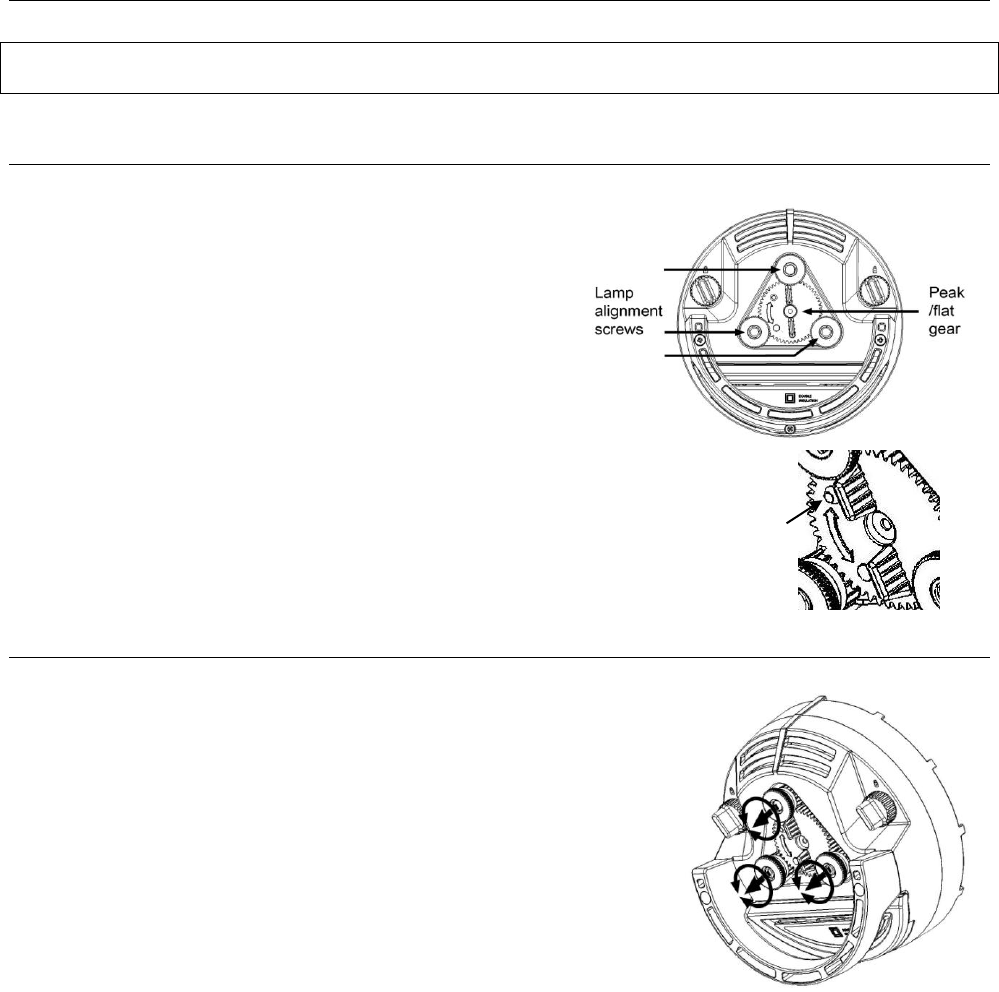
Centering the lamp
1 Remove the lamp holder as described above.
2 Level the lamp socket plate by adjusting the lamp
alignment screws.
3 Turn the peak/flat gear
4 Carefully replace the lamp holder module and tighten
the thumbscrew to lock it into position. Reconnect the
luminaire to the power supply.
5 Turn the peak/flat gear clockwise towards the peak
setting. This is indicated by the raised peak setting symbol on the peak/flat
gear. 5 half turns will shift the lamp into the approximate centre position.
6 Centre the lamp in the beam if necessary by adjusting the lamp
alignment screws.
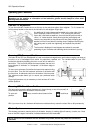
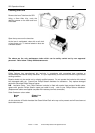
Optimising the Output
The lamp position can be altered to 'peak' or 'Flat' light output.
The peak beam gives a central hot spot falling off evenly to the beam
edges. This setting is useful for normal stage lighting purposes where
beams are overlapped to achieve an even cover.
Flat adjustment provides a visually even light beam suitable for gobo
projection. Take care to move the lamp carefully as the lamp filament is
burning white hot and at its most vulnerable.
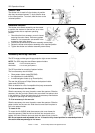
Don't over-tighten the knobs; finger tight pressure is all that is required.
1 Adjust the beam to its narrow angle, with a sharp edge.
2 Peak the output (turn the centre gear clockwise towards the peak symbol) until you see light flare
around the edge of the beam.
3 Turn the centre gear anti-clockwise towards the flat symbol until the flare is removed and you have a
clean sharp-edged beam. This is the position of maximum light output.
4 A useful technique to check how well the lamp is centred is to push two of the shutters into the beam,
and then check if any reflection off the shutters is visible in the beam. If so, adjust the screw on the
side opposite to the reflection until it disappears.
5 To set a „FLAT‟ beam, turn the centre gear anti-clockwise towards the flat symbol until the distribution
appears even across the beam.