


E-11
Names of the Remote Control Parts/Preparing the Remote Control
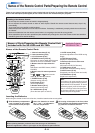
There are two types of remote control units included with the U5 series of projectors. Both types are described below.
Refer to the description (and diagram) for the remote control unit included with your projector.
Note:
If a button on the remote control unit is held
in continuously for approximately 30 seconds,
signal transfer will be suspended. To resume
transferring signals, press the button again.
Also, to use the jog button after signal trans-
fer has been suspended, first press any other
button, then press the jog button.
Names of Parts/Preparing the Remote Control Unit
Included with the U5-632h and U5-732h
Applicable Projector:
U5-632h/U5-732h
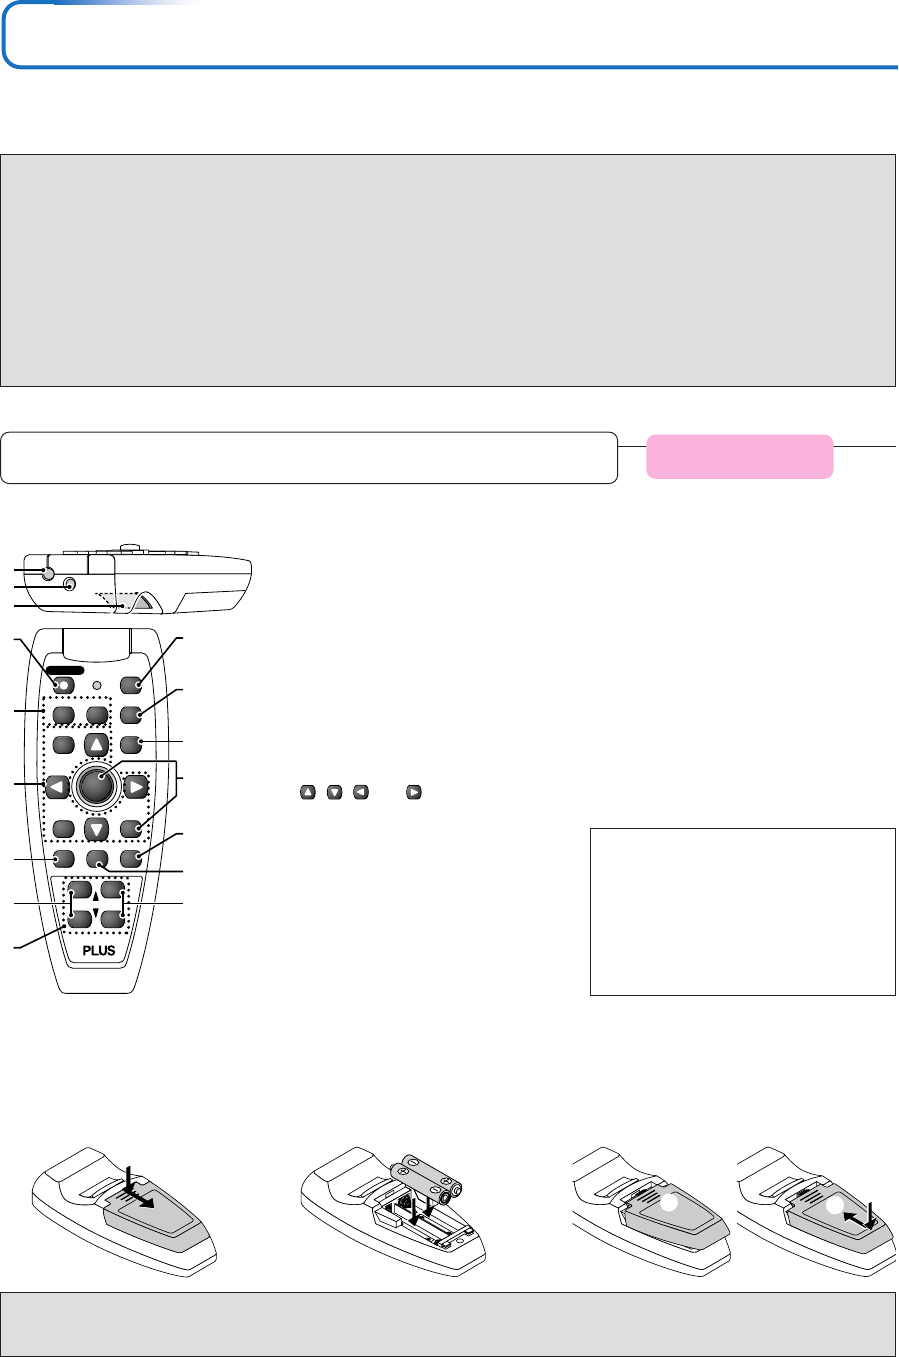
1. Infrared transmitter [E-12]
2. Laser transmitter [E-34]
3. L-CLICK button [E-35]
4. STANDBY button [E-23, 25]
This button is used to switch ON the power
and set the unit to the STANDBY mode.
5. Buttons used for input selection
[E-28]
RGB button and VIDEO button (VIDEO /
S-VIDEO)
6. Buttons used for menu operations
[E-40]
The , , and buttons are the
select (̆, ̄, ̇ and ̈) buttons.
7. FREEZE button [E-30]
(Freezes moving pictures)
8. VOL button [E-31]
(Volume adjustment)
9. Number buttons [E-37]
(Used for the security lock.)
10. LASER button [E-34]
(Turns the laser point on and off)
Names of the Remote Control Parts
FREEZE
MUTE
LASER
AUTO
TIMER
VOL
ZOOM
RGB
VIDEO
R-CLICK/
CANCEL
QUICKMENU
ENTER
STANDBY
Q
12
34
4
1
2
3
5
6
7
8
9
10
11
12
13
14
15
16
11. AUTO button [E-28]
(Automatic adjustment of the RGB moving
image)
12. QUICK button [E-39]
(Displays a simplified menu)
13. Buttons used for the PC mouse
function [E-35]
(JOG button and R-CLICK button)
14. TIMER button [E-33]
(Presentation timer time setting display)
15. MUTE button [E-30]
(Temporarily cancels the video and audio)
16. ZOOM button [E-32]
(Digital zoom adjustment)
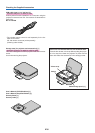
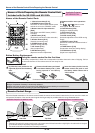
Inserting the Batteries
When using the remote control for the first time, install the batteries that were supplied.
(B)
(C)
(A)
2
Insert the batteries to match
the “+” and “–” as indicated in-
side the compartment.
1
Slide the battery compartment
cover (located on the bottom
of the remote control) and pull
off.
3
(A) Leaving a little space in the front, close
the lid, (B) then with the back pressed tightly,
(C) press the lid towards the front.
CAUTION
When replacing batteries, purchase two of the same type of AAA battery.
Heed the regulations in effect in your region on the disposal of spent batteries.
Precautions
Handling of the Remote Control
* Do not drop the remote control or handle it inappropriately.
* Do not expose the remote control to water or other liquids. Should the remote control become wet, wipe it dry
immediately.
* Try to avoid use in hot and/or humid locations.
* Please keep button batteries out of the reach of children. If a battery is swallowed, promptly obtain the medical care
of a doctor.
* Remove the batteries from the remote control when it is not going to be used for a long period.
* Some operations (such as menu operations) are available only through the use of the remote control and attention
should be given to its careful handling.