


26 Using the projector
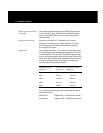
Image optimization
Making adjustments
Use the projector SETUP and IMAGE menus to adjust the
to settings
settings to fine-tune your projected image.
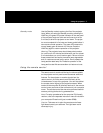
Your projector factory-default settings are designed
to configure it with your computer and video sources
automatically to provide a high-quality projected image.
Because of operational differences between the projector
and computer and video sources, you may want to make
minor setting adjustments to optimize your displayed
image. After connecting your projector to the desired
source and turning on your equipment, view a test image
on your computer monitor that typifies what you want to
display for presentation purposes.
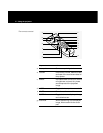
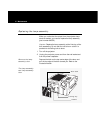
Eliminating phase bars
Examine the projected image for evenly spaced
“vertical noise” or “phase” bars. Use the PHASE
option to eliminate them:
1 From the projector control panel or remote control,
press the IMAGE menu key.
2 Using the cursor pad, scroll through the menu selections
and highlight PHASE on the on-screen menu display.
3 Use the left arrow (<) or right arrow (>) key on the cursor
pad to eliminate the phase bars. Try both arrow keys and
select the one that reduces the number of “phase bars”
on the screen (by spacing the bars farther apart from one
another). Continue pressing the same arrow key until you
remove all phase bars from the screen. (You may still notice
horizontal noise or jittering on the screen; see the following
for correction.)