


11
Names and functions of each part (continued)
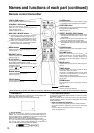
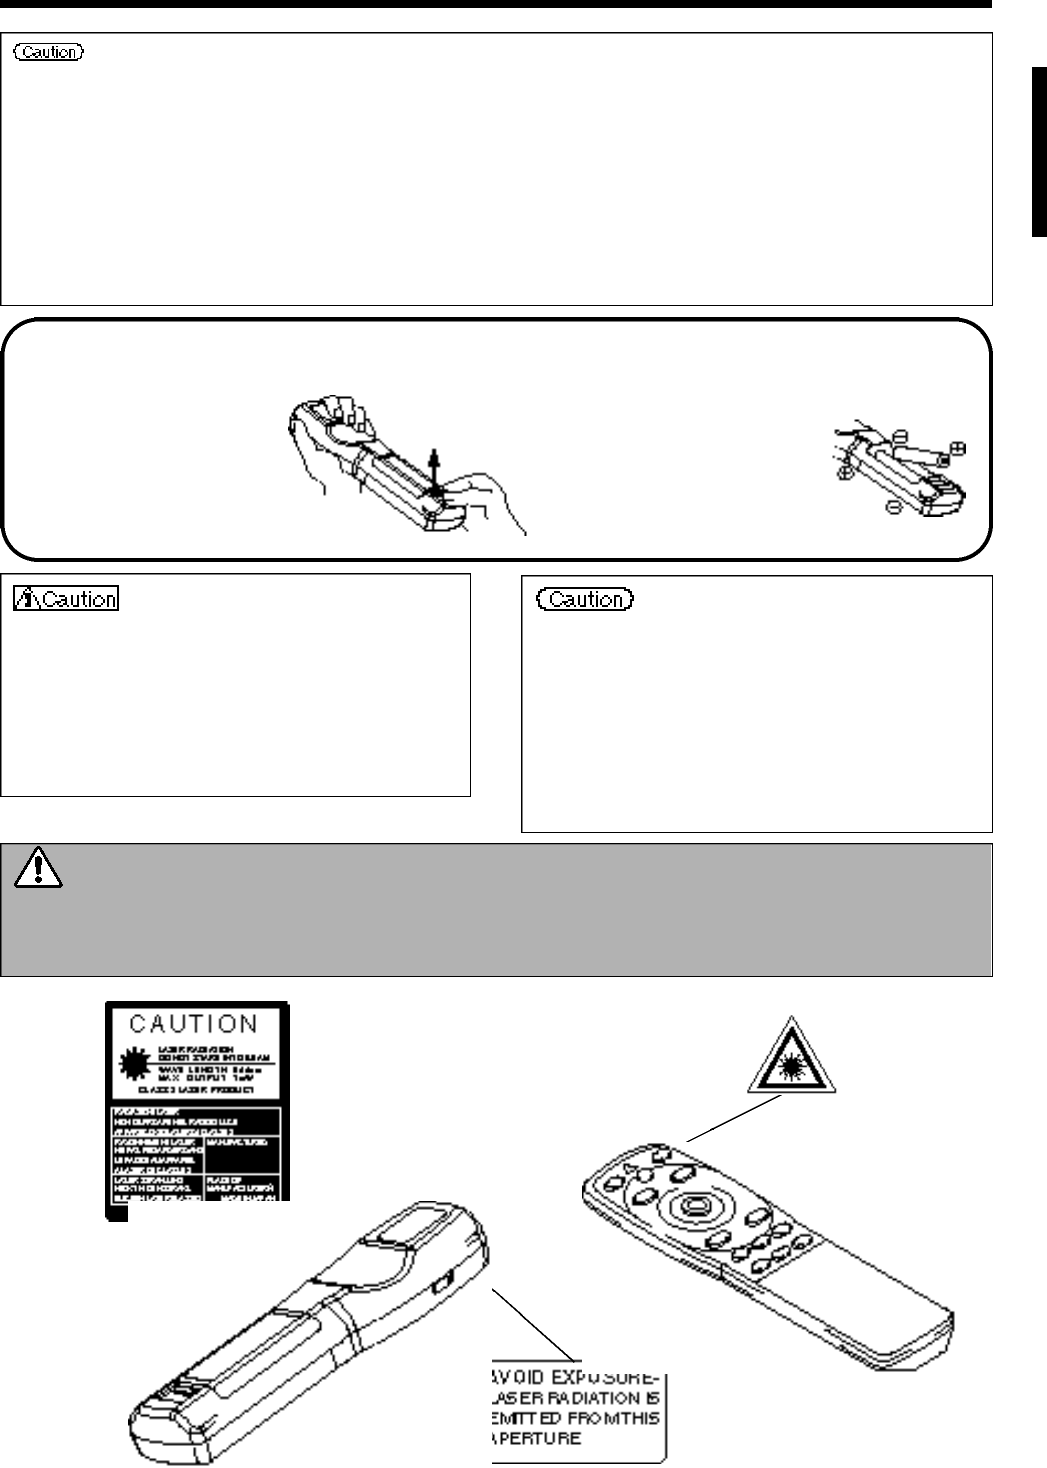
Loading the batteries Loading AA batteries into the remote control.
The laser pointer of the remote control is used as a pointer.
N ever look directly into the laser beam outlet or point the laser beam at
other people.
The laser beam can cause vision problems.
Warning
1R e m ove the battery
cover.
Push the knob while
lifting up the battery
cover.
2Loading the batteries.
Make sure the plus and
minus poles are correctly
o r i e n t e d .
3Close the battery cover.
Battery usage cautions
•
Use only the specified batteries with this projector. Also, do
not mix new and old batteries. This could cause in battery
cracking or leakage, which could result in fire or personal
injury.
•
When loading the batteries, make sure the plus and minus
poles are correctly oriented as indicated in the projector.
Incorrect orientation could cause battery cracking or leakage,
which could result in personal injury or pollution of the
surrounding environment.
Remote control usage cautions
•
Do not drop the remote control or apply impact.
•
Do not wet the remote control or place it on any wet object.
Such actions could result in malfunction.
•
When not to be used for an extended period, remove the
batteries from the remote control.
•
Replace the batteries when remote control operation
becomes difficult.
•
Do not place the remote control close to the cooling fan of
the projector.
•
Do not disassemble the remote control in case of
malfunction. please bring it to the service station.
• Auto adjust can take up to 30 seconds.
• Auto adjust may not operate correctly in some cases, depending on the computer connected and the signal.
• Be sure to expand images to full screen size when displaying low resolution images.
• After auto adjust, the image may be slightly dark in some cases due to automatic adjustment of the signal level.
• Auto adjust can not execute when the initial display is “NO INPUT IS DETECTED” or “SYNC IS OUT OF RANGE”
during FREEZE or MAGNIFY.
• Auto Adjust is executed when the following operations are performed.
1. When the type of input source signal is changed.
2. When the Auto Adjust (AUTO) button is pressed.
• The message AUTO IN PROGRESS will be displayed on the screen during automatic adjustment.
• The screen may be disrupted during automatic adjustment but this is not a malfunction.
• RGB1 or RGB2 only can be used as the input signal.
• Auto Adjust can also be executed using the operation buttons of the main unit. Hold down the RESET button and press
the input switch (INPUT) button.