


Rack Installation Polycom Digital Signage Server Hardware Setup
Polycom, Inc. 15
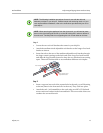
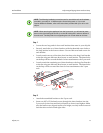
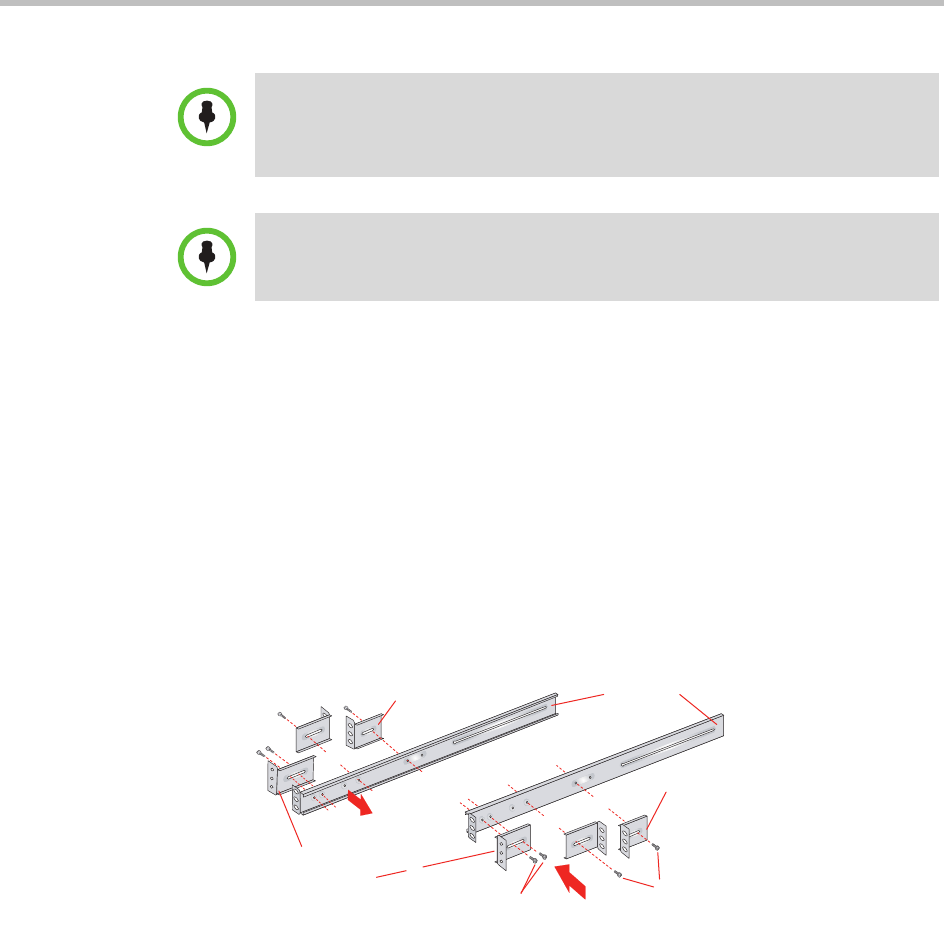
Step 1
• Locate the two long and six short rack brackets that came in your ship kit.
• Securely attach the set of short brackets with the threaded screw holes to
the long bracket in the front as shown. Use two M4 truss head screws for
each bracket.
• Loosely attach one set of the other short brackets to the long fixed bracket
as shown using one M4 truss head screw on each bracket. The three holes
on the flap will face toward the back for later attachment to the 2-post rack.
• Loosely attach the remaining set of short brackets to the long fixed bracket
as shown using one M4 truss head screw on each bracket. The three holes
on the flap will face toward the front for later attachment to the 2-post
rack.
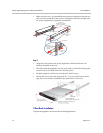
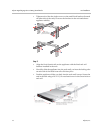
Step 2
• Attach the assembled brackets to the 2-post rack.
• Insert two M5 x 12 flat head screws through the short brackets into the
2-post rack (in the front and back of therack as shown) and tighten. Make
sure the brackets are aligned and level in height, not only in the front and
back but also on the left and right sides.
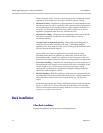
NOTE: The following installation procedures are for use with the rails and hardware
provided in your ship kit. If different style rails are being used, or if your rack
requires different hardware, refer to the instructions provided with your rail or rack
ship kit.
NOTE: When removing the appliance from the 2-post rack, you will need to press
down on the right locking tab and lift up on the left locking tab in order to release it
from the rack. Carefully slide it out supporting the unit on both sides at all times.
Small fixed
rack brackets
Small fixed
rack brackets with
threaded holes
Small fixed
rack brackets
Long bracket
B
C
B
C
A
A
Two M4 truss
head screws
One M4 truss
head screw