


Part 10
program covers each track enable/disable, Alt+Num approach for ASCII codes
and Leading/Stop code enable/disable. The function for enabling each track of
course comes in effect only when the track is physically available. Please find
in the mini CD delivered with SD200 or Product Information CD delivered
with Posiflex POS system the folder for “USBMSR” and “SetUp” this demo
program or download the installation program from our web sites
http://www.posiflex.com or http://www.posiflex.com.tw.
For ISO MSR in KP100 / KP110, please find in the CD ROM attached
to the system for the product KP100 / KP110 under subdirectory drivers and
then Jiva (TP series) according to what the host system is and then look for
KP100 for installation of the program controlling the keypad (usually referred
to as KBM). Please in the controlling program after installation enter the
configuration of the keypad and then access the configuration for the MSR.
The features controllable in this program are the same as that for SD100 by
jumper setting.
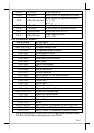
IBUTTON RECEPTOR
Each iButton receptor is delivered with 2 iButton keys attached. Each
iButton key carries unique ID. Please approach your dealer for any additional
iButton key required.
PROGRAMMABLE KEYPAD
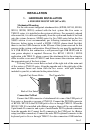
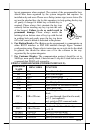
a. Labeling On Key Top
Before first time use of the keypad in
KP100 / KP110, an identification operation may
be required. First preprint (or write) in each cell
of the attached colored legend sheet the “name”
for each key. Stick each cell to the corresponding
key top and then put on the transparent key cap
from the accessories. In this way, the labeling
will be protected and resistant to scratch or
rubbing. Use the attached key clip to hook up the
transparent key cap and change the label then re-cap when re-labeling is
required. Expand the key clip for cap of double key if exist.
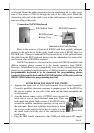
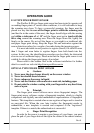
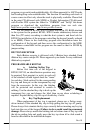
b. Key Top Replacement
When replacement of key top is required, please use a flattop screw
driver instead of the attached key clip to help getting the key top off gently.
Please always first orientate the key tops correctly before inserting any key top
back into the case of the keypad. Failure to do so could result in permanent
damage. Please always match the latching tab on bottom stem of key top with
the tab in guiding hole and gently press the key top down till a click sound is
heard as described in the installation chapter.