


2 MXU2
Manual Chapter 1. Getting Started
• Contains individual user-controlled functions to AutoSkip inactive channels and to
AutoScan computers at variable rates
• Engineered with multilevel security to ensure authorized access to each computer by
each user
• Expand capabilities by cascading MXU2
units using 1 or 2 ports.
• OSUI supports English, French, and German keyboard layouts
• Available firmware upgrades via built-in DB9 administration port
Quick Installation and Test
Chapter 4 specifies a detailed installation procedure. For a quick installation and test of MXU2,
perform the following:
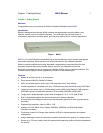
1. Unwrap the MXU2 unit from the packing box.
2. Plug the power cord into the MXU2 and turn the power switch to ON.
3. Plug a user console-keyboard, monitor, and mouse-into the connectors marked keyboard,
monitor, and mouse on the back panel of the MXU2.
4. Plug in monitor’s power cord and power on monitor.
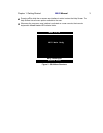
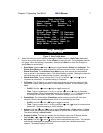
5. Login Menu will now be displayed on the monitor. The keyboard’s <Scroll Lock> LED will
be blinking.
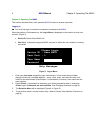
6. Enter ADMIN as user name, and press <Enter>. Enter ”raritan” (case sensitive) and press
<Enter>. The Selection Menu will be displayed on the monitor.
7. Unwrap a universal cable, CCPnn. Plug the DB25 connector into a channel on the back panel
of the MXU2 unit.
8. Plug the other end of the cable into a PC’s keyboard/mouse/VGA ports.
9. Power on the PC.
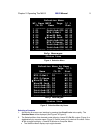
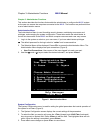
10. The PC channel on the Selection Menu will turn green.
11. Use the keyboard <> and <> keys to select the green line, and press <Enter>.
12. You will now be able to operate the PC connected to MXU2.
Congratulations! This quick test is complete.
1
To go back to the MXU2 selection menu, press the <Scroll Lock> key twice rapidly. This
activates the on-screen user interface. The <Scroll Lock> LED on the user console
keyboard blinks, indicating the on-screen user interface has been activated.
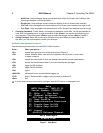
MXU2 On-Screen User Interface
The MXU2 on-screen user interface (OSUI) consists of a simple hierarchy of menus and screens.
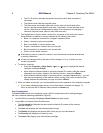
Each menu (except Login Menu) contains the following sections (Figure 2):
• Title Line
• Menu/Screen Body (for text and fields)
• Help Messages
• Status Line (displays Skip/Scan status and OSUI activator)
Function keys F1, F2, F4, and F5 switch between different first-level menus.
1
The symbol provides hints and tips.