


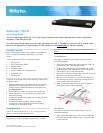


KX III Quick Setup Guide 4
QSG-DKX3-v3.0.0-0B-E 255-62-0003-00-RoHS
Configure the IPv6 Settings
1. If using IPv6, enter or select the appropriate IPv6-specific
network settings in the IPv6 section:
a. Select the IPv6 checkbox to activate the fields in the
section and enable IPv6 on the device.
b. Enter a Global/Unique IP Address. This is the IP
address assigned to the KX III.
c. Enter the Prefix Length. This is the number of bits
used in the IPv6 address.
d. Enter the Gateway IP Address.
e. Link-Local IP Address. This address is automatically
assigned to the device, and is used for neighbor
discovery or when no routers are present. Read-Only
f. Zone ID. Identifies the device the address is
associated with. Read-Only
g. Select an IP Auto Configuration option:
None - use this option if you do not want an auto IP
configuration and prefer to set the IP address yourself
(static IP). This is the default and recommended
option.
If None is selected, the following Network Basic
Settings fields are enabled: Global/Unique IP Address,
Prefix Length, and Gateway IP Address allowing you
to manually set the IP configuration.
Router Discovery - use this option to automatically
assign IPv6 addresses that have Global or Unique
Local significance beyond that of the Link Local, which
only applies to a directly connected subnet.
2. Next, configure DNS settings.
Configure the DNS Settings
1. Select Obtain DNS Server Address Automatically if DHCP
is selected and Obtain DNS Server Address is enabled.
When Obtain DNS Server Address Automatically, the DNS
information provided by the DHCP server will be used.
2. If Use the Following DNS Server Addresses is selected,
whether or not DHCP is selected, the addresses entered
in this section is used to connect to the DNS server.
Enter the following information if the Following DNS
Server Addresses is selected. These addresses are the
primary and secondary DNS addresses used if the primary
DNS server connection is lost due to an outage.
a. Primary DNS Server IP Address
b. Secondary DNS Server IP Address
3. When finished, click OK.
Your KX III device is now network accessible.
Name Your Target Servers
To name the target servers:
1. Connect all of the target servers if you have not already
done so.
2. Select Device Settings > Port Configuration, then click the
Port Name of the target server you want to name.
3. Enter a name for the server.
Up to 32 alphanumeric and special characters.
4. Click OK.
Specify Power Supply Autodetection
The KX III provides dual power supplies.
When both power supplies are used, the KX III automatically
detects them and notifies you of their status.
Additionally, both the Powerln1 and Powerln2 Auto Detect
checkboxes are automatically selected on the Power Supply
Setup page.
If you are using only one power supply, you can enable
automatic detection for only the power supply in use.
To enable automatic detection for the power supply in
use:
1. Choose Device Settings > Power Supply Setup. The
Power Supply Setup page opens.
2. If you are plugging power input into power supply number
one (left-most power supply at the back of the device),
select the Powerln1 Auto Detect option.
3. If you are plugging power input into power supply number
two (right-most power supply at the back of the device),
select the Powerln2 Auto Detect option.
4. Click OK.
If either of these checkboxes is selected and only power input
is connected, the power LED on the front of the device is Red.
Configure Date/Time Settings (Optional)
Optionally, configure the date and time settings.
The date and time settings impact SSL certificate validation if
LDAPS is enabled.
To set the date and time:
1. Choose Device Settings > Date/Time. The Date/Time
Settings page opens.
2. Choose your time zone from the Time Zone drop-down
list.
3. Adjust for daylight savings time by checking the "Adjust for
daylight savings time" checkbox.
4. Choose the method to use to set the date and time:
User Specified Time - use this option to input the date
and time manually. For the User Specified Time
option, enter the date and time. For the time, use the
hh:mm format (using a 24-hour clock).
Synchronize with NTP Server - use this option to
synchronize the date and time with the Network Time
Protocol (NTP) Server.
5. For the Synchronize with NTP Server option: