


Area Editing (Option)
120
4
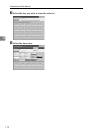
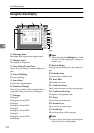
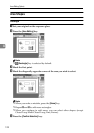
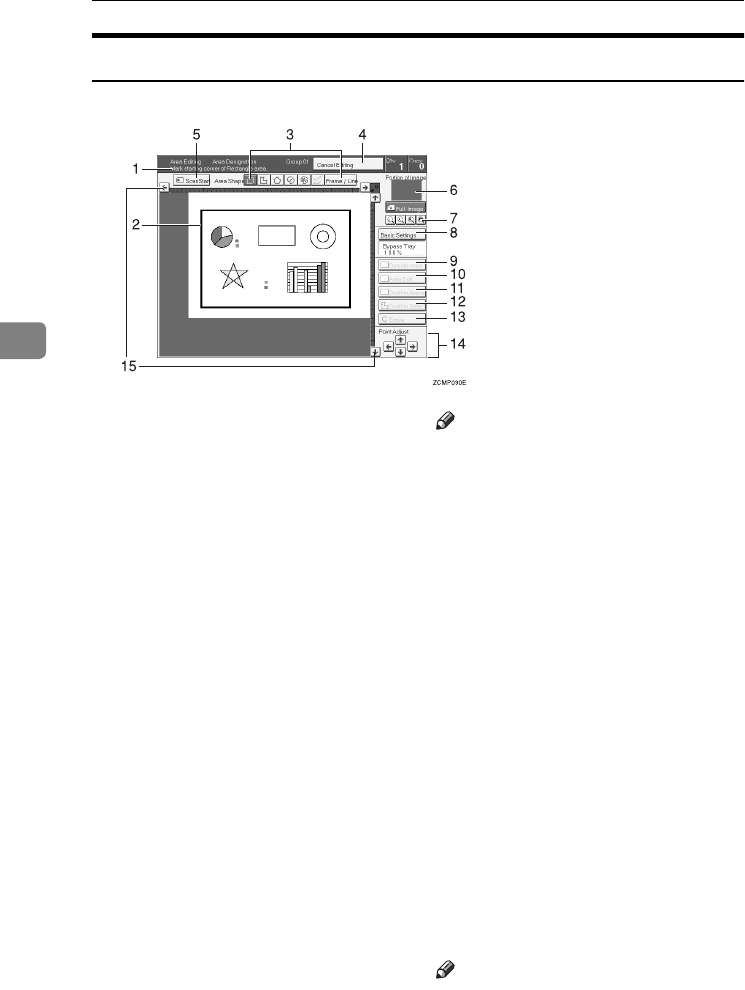
Designate Area Display
1.
Message Area
Messages and instructions appear here.
2.
Display Area
The image is displayed.
3.
Area Shape/Frame/Line
Select the area shape or frame shape and
line.
4.
Cancel Editing
Exit area editing.
5.
Scan Start
Scan in the original again.
6.
Portion of Image
Shows the portion of the original that is
currently being viewed or is enlarged.
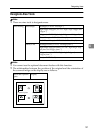
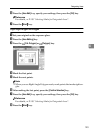
7.
Enlarge
Enlarge 4
Enlarge by about 528%
Enlarge 3
Enlarge by about 394%
Enlarge 2
Enlarge by about 264%
Enlarge 1
Enlarge by about 200%
Full Image
Note
❒ After pressing the [Enlarge] key, mark
a point in the displayed image to
zoom in on.
8.
Basic Settings
Change the job settings for the entire im-
age.
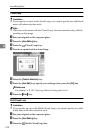
9.
Outside Area
Set modes for outside areas.
10.
Area Edit
Edit inside the area.
11.
Confirm Areas
Show selected areas, modes, and groups.
12.
Confirm Selection
Complete a designated area.
13.
Erase
Cancel last point selected.
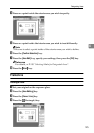
14.
Arrow keys
Move cursor in small steps.
15.
Scroll key
Move the portion of the original.
Note
❒ Do not press the touch panel display
with any hard or sharp object.
Zcmp030e.eps