


Runco VX-6000d Installation/Operation Manual 73
PRE
L
IMINAR
Y
5.1
Lamp Replacement
The lamp should be replaced when it reaches the end of its life (typically 2000 hours), or
sooner if a noticeable degradation in brightness occurs. Contact your Runco dealer to
obtain a replacement lamp.
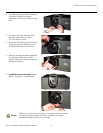
1. Turn off the projector and unplug the power cord. Allow the projector to cool down for
approximately 45 minutes prior to removing the lamp assembly for replacement.
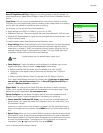
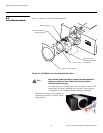
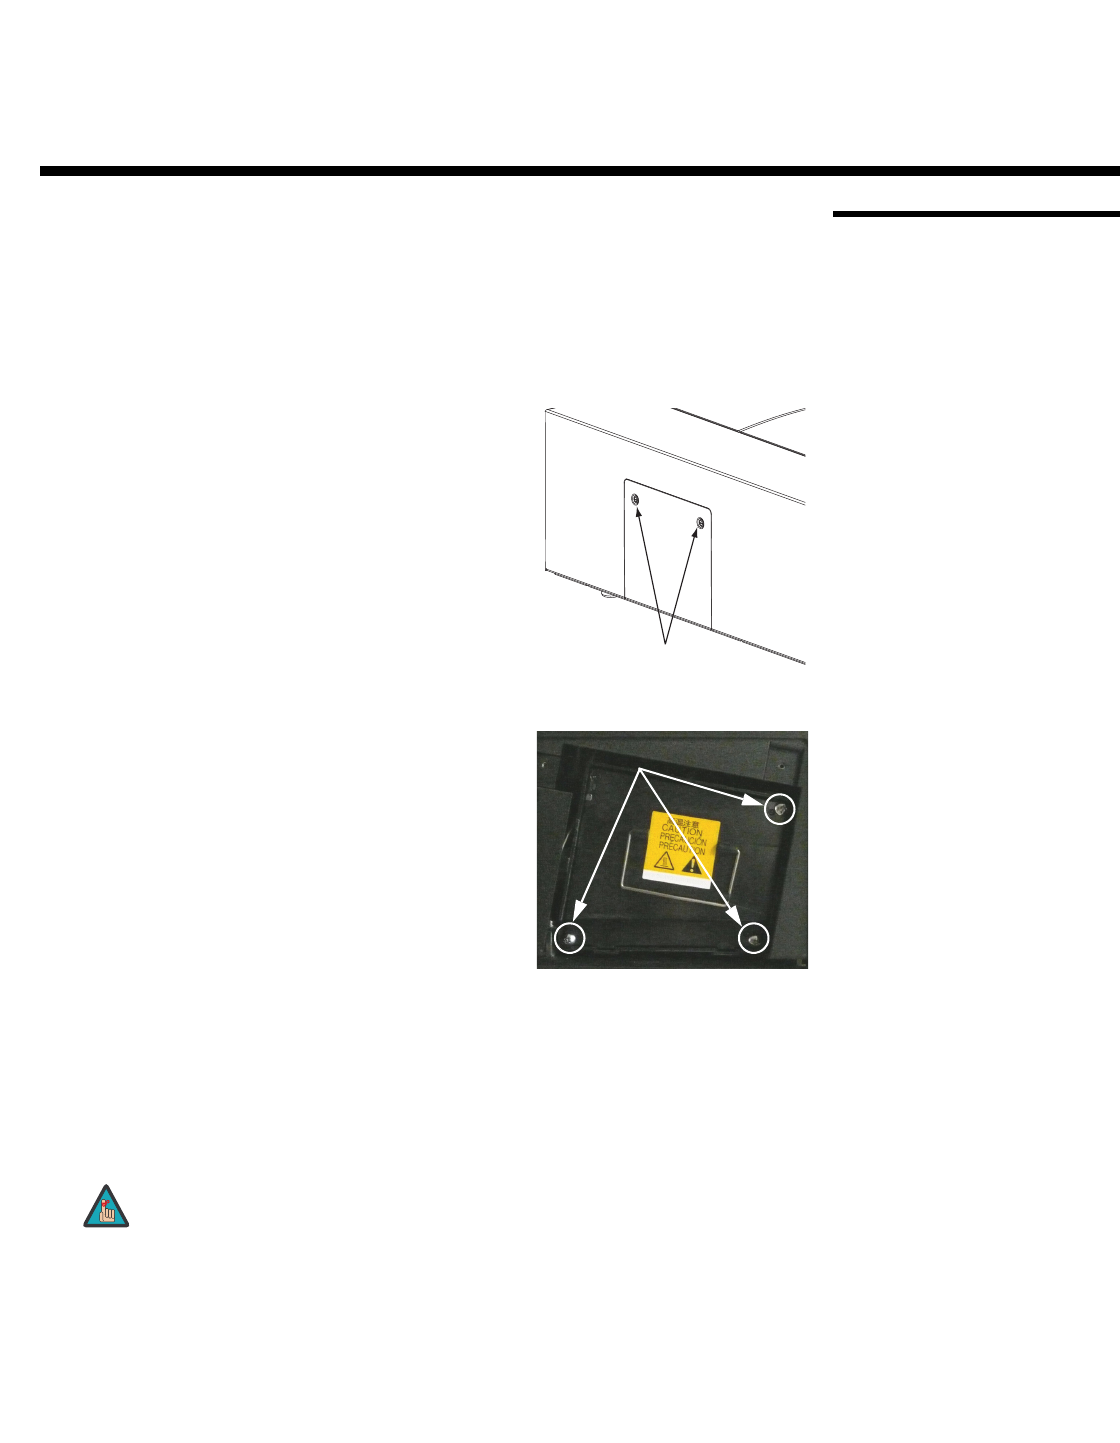
2. Loosen the two captive Lamp Cover screws on the
side of the projector and remove the cover.
3. Remove the three Phillips round-head lamp
assembly mounting screws. These are identified by
arrows pointing to them on the lamp housing.
4. Grasp the lamp assembly handle and pull gently,
removing the lamp module from the projector
housing.
5. Install the new lamp module. Secure it in place with
the three screws that you removed in Step 3.
6. Replace the lamp cover and re-tighten the two
Lamp Cover screws.
7. Re-connect the AC power cord to the projector.
8. Reset the Lamp Hour counter. To do this, press and hold the ENTER, DOWN and
RIGHT buttons on the projector rear-panel keypad (see
Figure 2-2) simultaneously.
Then, press the ON button. When you do, “LAMP 0000H” appears on-screen to
confirm the counter reset.
5. Maintenance and Troubleshooting
Always reset the Lamp Hour counter when you replace the lamp.
Do this only if you have just installed a new lamp. This will ensure
that number of hours logged on the lamp is accurate.
REMOVE
THESE SCREWS
Lamp Mounting Screws
Note